How to Create Your Own String Lights

In our post today, we’d like to show you some ideas on how to make your own string lights. You’ll just need to follow the simple steps below to make them.
String lights are a wonderful option if you’re a fan of DIY projects. By making your lights yourself you’ll be saving money.
In addition, there are various ways to undertake this project, some being more elaborate than others. You could hang your string lamps in any room, indoors or outdoors (balconies or patios)– it all depends on what you prefer. So, in addition to being a light source, string lights can also work as home decor.
Of course, before you put them up, you need to know where the nearby outlets are. If you’d rather not design around the location of the outlets, you could always use battery-powered lights instead.
One last idea – when you’re choosing the bulbs for your string lights, you’ll find many different sizes, shapes, and colors. LED lights are your best bet for saving energy.
How can you make your own string lights?
Below, we’ll give you some ideas on making string lights. They’re all pretty easy to follow, economical, and time-efficient. You’ll be able to make them on your own with no problem.
- Small ball string lights (like ping pong balls): how many balls you’ll need for this idea depends on how many lights there are on your string light. You just need to make two holes in each ball so the string can pass through. You could use colored balls, or decorate them by hand.
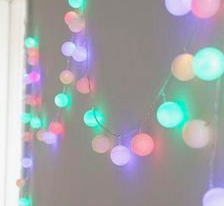
Ping pong ball string lights / pinterest.es - Balloons and string: first, blow up the balloons but don’t make them too big. Then mix some glue and water together and put it onto the string (the thicker the better). When the string is wet with the mixture, wind it around the balloons leaving the knot free. When the balloons are dry, pop them and you’ll be left with the solid string structures. You pass the string lights through the open area that you left for the balloon’s knot.
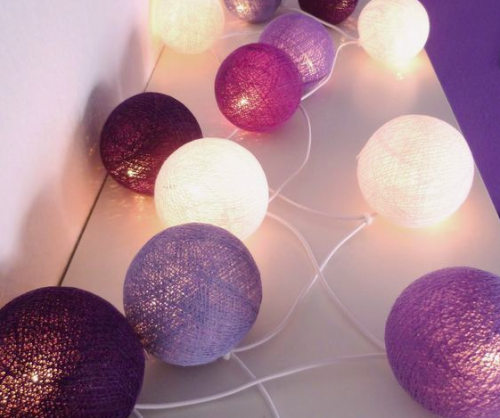
Balloon string light / pinterest.es
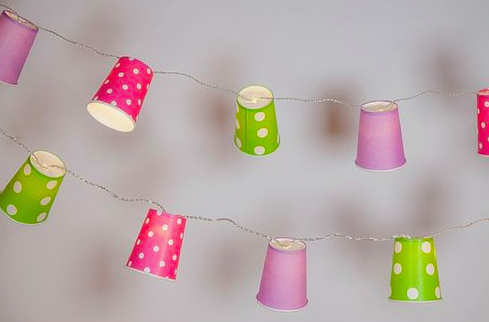
Paper cup string lights: this one is simple; you just need to make a small hole at the bottom of a paper cup to pass the string lights through. For pretty, original lights you’ll need to play around with the colors and patterns of the paper cups. A variation on this idea includes making small cuts in the sides of the cups. It’ll give you a very beautiful lighting effect.
As you can see, none of these ideas are especially difficult. The balloon idea might be a little more complicated, but it’s still an easy project to tackle. So, you can try these ideas out for craft time with children no problem! They’ll love it.
Remember that the number of ping pong balls, paper cups, balloons, etc. will depend on how many lightbulbs your string light has.
A more elaborate idea
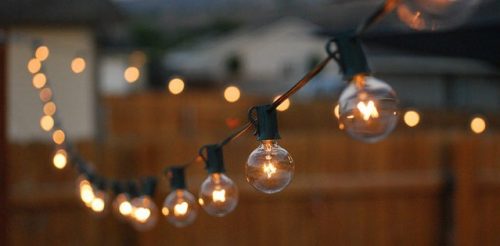
If you’re looking for something more complex, this next idea will require a bit more effort because you have to make the string light itself. The basic materials that you’ll need are lightbulbs, sockets, a plug, and a wire that’s several meters long.
First, cut the wire into equal parts. You’ll need to think about how much distance you want in between each bulb. Next, join the pieces together carefully, excluding the first and last piece where you’ll join a lightbulb and the plug, respectively.
After you connect the wire pieces together, you can add the sockets but make sure to do this carefully. When you’re finished, just screw in the bulbs.
This DIY project will take you more time, but the results will be beautiful. Make sure that the wire sections are long enough to carry out the plans that you originally had in mind.
Conclusion
We really hope that our ideas are helpful. Remember that you need to correctly measure out the space that you have available to make the most of it.
With string lights, you’ll be able to decorate in a beautiful, original way. Decorating with lights really gives impressive results. So, we hope that you’ll try out one of our ideas.
And remember that it’s easy to make string lights. You can even buy them online at great prices. There are no excuses not to make your own string lights.
In our post today, we’d like to show you some ideas on how to make your own string lights. You’ll just need to follow the simple steps below to make them.
String lights are a wonderful option if you’re a fan of DIY projects. By making your lights yourself you’ll be saving money.
In addition, there are various ways to undertake this project, some being more elaborate than others. You could hang your string lamps in any room, indoors or outdoors (balconies or patios)– it all depends on what you prefer. So, in addition to being a light source, string lights can also work as home decor.
Of course, before you put them up, you need to know where the nearby outlets are. If you’d rather not design around the location of the outlets, you could always use battery-powered lights instead.
One last idea – when you’re choosing the bulbs for your string lights, you’ll find many different sizes, shapes, and colors. LED lights are your best bet for saving energy.
How can you make your own string lights?
Below, we’ll give you some ideas on making string lights. They’re all pretty easy to follow, economical, and time-efficient. You’ll be able to make them on your own with no problem.
- Small ball string lights (like ping pong balls): how many balls you’ll need for this idea depends on how many lights there are on your string light. You just need to make two holes in each ball so the string can pass through. You could use colored balls, or decorate them by hand.

Ping pong ball string lights / pinterest.es - Balloons and string: first, blow up the balloons but don’t make them too big. Then mix some glue and water together and put it onto the string (the thicker the better). When the string is wet with the mixture, wind it around the balloons leaving the knot free. When the balloons are dry, pop them and you’ll be left with the solid string structures. You pass the string lights through the open area that you left for the balloon’s knot.

Balloon string light / pinterest.es
Paper cup string lights: this one is simple; you just need to make a small hole at the bottom of a paper cup to pass the string lights through. For pretty, original lights you’ll need to play around with the colors and patterns of the paper cups. A variation on this idea includes making small cuts in the sides of the cups. It’ll give you a very beautiful lighting effect.

As you can see, none of these ideas are especially difficult. The balloon idea might be a little more complicated, but it’s still an easy project to tackle. So, you can try these ideas out for craft time with children no problem! They’ll love it.
Remember that the number of ping pong balls, paper cups, balloons, etc. will depend on how many lightbulbs your string light has.
A more elaborate idea
If you’re looking for something more complex, this next idea will require a bit more effort because you have to make the string light itself. The basic materials that you’ll need are lightbulbs, sockets, a plug, and a wire that’s several meters long.
First, cut the wire into equal parts. You’ll need to think about how much distance you want in between each bulb. Next, join the pieces together carefully, excluding the first and last piece where you’ll join a lightbulb and the plug, respectively.
After you connect the wire pieces together, you can add the sockets but make sure to do this carefully. When you’re finished, just screw in the bulbs.
This DIY project will take you more time, but the results will be beautiful. Make sure that the wire sections are long enough to carry out the plans that you originally had in mind.

Conclusion
We really hope that our ideas are helpful. Remember that you need to correctly measure out the space that you have available to make the most of it.
With string lights, you’ll be able to decorate in a beautiful, original way. Decorating with lights really gives impressive results. So, we hope that you’ll try out one of our ideas.
And remember that it’s easy to make string lights. You can even buy them online at great prices. There are no excuses not to make your own string lights.

