Woodblock Printing: Create Beautiful Objects
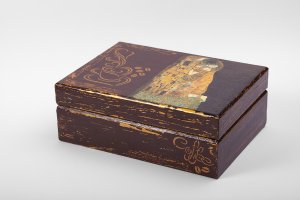
Woodblock printing can be an original, fun way to decorate your home. There are different ways to print. In our post today, we want to show you a lovely way to print on wood, transferring an image onto its surface.
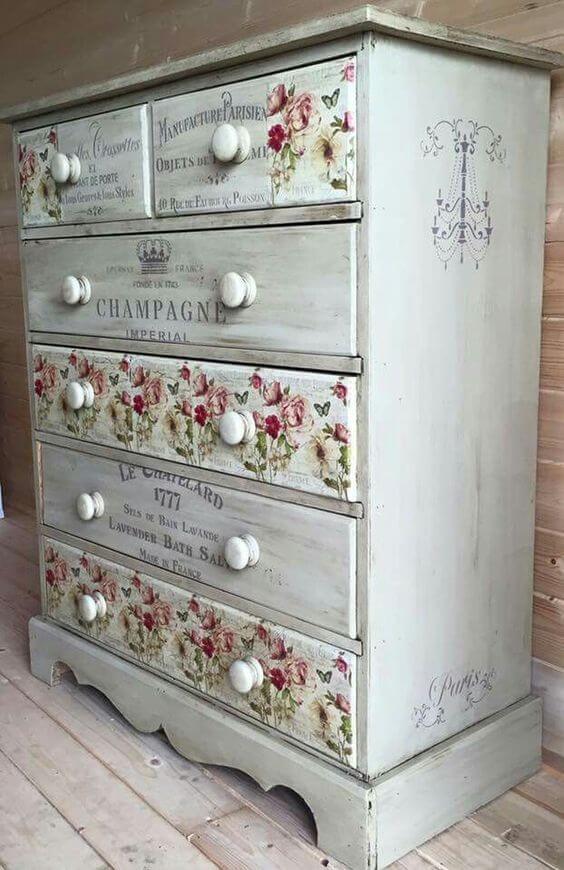
Choose whatever mount that you want to print on. If you have leftover wooden boards, this would be a great chance to make special pictures. Or, if you have a piece of furniture or a wooden object that you want to restore this would work too.
Woodblock printing consists of moving one surface to another or transferring an image to another mount. It’s similar to the decoupage technique, but is more modern and you can use images.
How to woodblock print
Materials
Below, read over the materials that you’ll need to get started:
- Wood
- Sublimation sheets
- Transfer medium
- Varnish
- Paintbrush
- Spatula
- Sponge
Pick out the mount for your woodblock printing
The wooden mount can be a scrap of wood in whatever shape that you want. It could be rectangular, square or an irregular shape as well. This small or medium-sized mount will serve as your base for this original technique.
Or, you could also choose a big piece of furniture that you want to restore, a chest or even a tea box. It’s up to you; you can choose any surface to print on. With the liberty to choose, you can create new objects that are decorated with your favorite images or designs.
An important tip: clean your wooden mount carefully before starting. You can also paint it first if you want.
Sublimation transfer sheets
Unlike decoupage, woodblock printing doesn’t call for pasting an image onto a mount. Instead, you’ll transfer the prepared image, and only the image, onto the mount’s surface.
You can transfer images by using an image that’s laser-printed on paper. It shouldn’t be shiny or laminated; using the wrong kind of paper will make the transfer process impossible.
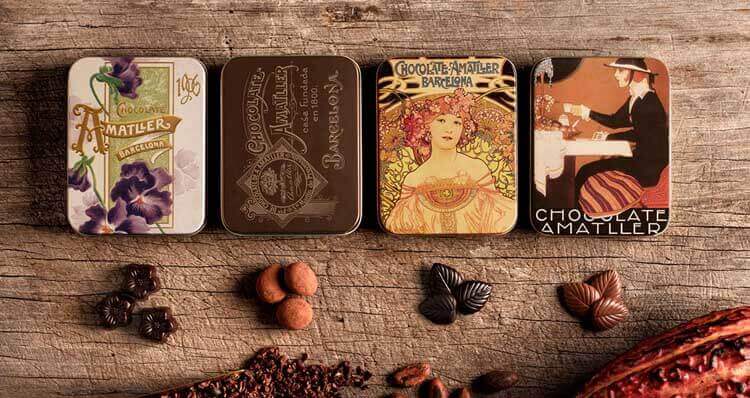
Choose the image that you want to transfer: a pattern, family photograph or make a gift with a friend’s photograph. Print the image on laser paper and you’re done: now you have your picture ready for the next step.
Alternatively, you can buy transfer paper with set images if you want to speed up the process. It’s up to you.
Transfer medium
Transfer medium is a product that absorbs the ink from the image on a piece of paper. You can find it easily in any arts and crafts store.
Mark the area where you want to transfer your image to on the mount. After, use a paintbrush to apply a generous amount of transfer medium onto the mount and the image. Cover their surfaces completely.
When finished, set the image face down onto the mount, applying pressure with your spatula. Smooth on the paper and make sure there aren’t any air bubbles.
Once you’ve set your image onto your mount, leave it to dry for 24 hours. If you want, dry it with a hairdryer for a couple of minutes.
Last steps: remove the paper and apply varnish
Once the entire surface is dried, carefully dampen it with water. Slowly remove the remaining paper with a sponge. You’ll start to see the image underneath, printed onto your mount. Isn’t it magical?
When you’ve removed all of the paper, you’ll have a beautiful woodblock print in your hands. It’ll be one of your treasured images transferred directly onto one of your favorite mounts.
When your mount is free of paper bits, apply a coat of varnish to protect the surface. It’ll help finish your new work of art. Choose whichever varnish that you prefer: shiny or matte.
This craft is one of the many ways to print on wood. As we mentioned earlier, you can also decoupage your images onto wooden mounts.
Woodblock printing is a similar process and a fantastic way to embellish or restore objects at home.
There are tons of ways to print; you just need to learn more about it if you’re interested in the technique. Doing crafts and restoring objects will also help you hone your creativity and clear your mind from worries.
Woodblock printing can be an original, fun way to decorate your home. There are different ways to print. In our post today, we want to show you a lovely way to print on wood, transferring an image onto its surface.
Choose whatever mount that you want to print on. If you have leftover wooden boards, this would be a great chance to make special pictures. Or, if you have a piece of furniture or a wooden object that you want to restore this would work too.
Woodblock printing consists of moving one surface to another or transferring an image to another mount. It’s similar to the decoupage technique, but is more modern and you can use images.
How to woodblock print
Materials
Below, read over the materials that you’ll need to get started:
- Wood
- Sublimation sheets
- Transfer medium
- Varnish
- Paintbrush
- Spatula
- Sponge
Pick out the mount for your woodblock printing
The wooden mount can be a scrap of wood in whatever shape that you want. It could be rectangular, square or an irregular shape as well. This small or medium-sized mount will serve as your base for this original technique.
Or, you could also choose a big piece of furniture that you want to restore, a chest or even a tea box. It’s up to you; you can choose any surface to print on. With the liberty to choose, you can create new objects that are decorated with your favorite images or designs.
An important tip: clean your wooden mount carefully before starting. You can also paint it first if you want.

Sublimation transfer sheets
Unlike decoupage, woodblock printing doesn’t call for pasting an image onto a mount. Instead, you’ll transfer the prepared image, and only the image, onto the mount’s surface.
You can transfer images by using an image that’s laser-printed on paper. It shouldn’t be shiny or laminated; using the wrong kind of paper will make the transfer process impossible.
Choose the image that you want to transfer: a pattern, family photograph or make a gift with a friend’s photograph. Print the image on laser paper and you’re done: now you have your picture ready for the next step.
Alternatively, you can buy transfer paper with set images if you want to speed up the process. It’s up to you.
Transfer medium
Transfer medium is a product that absorbs the ink from the image on a piece of paper. You can find it easily in any arts and crafts store.
Mark the area where you want to transfer your image to on the mount. After, use a paintbrush to apply a generous amount of transfer medium onto the mount and the image. Cover their surfaces completely.
When finished, set the image face down onto the mount, applying pressure with your spatula. Smooth on the paper and make sure there aren’t any air bubbles.
Once you’ve set your image onto your mount, leave it to dry for 24 hours. If you want, dry it with a hairdryer for a couple of minutes.
Last steps: remove the paper and apply varnish
Once the entire surface is dried, carefully dampen it with water. Slowly remove the remaining paper with a sponge. You’ll start to see the image underneath, printed onto your mount. Isn’t it magical?
When you’ve removed all of the paper, you’ll have a beautiful woodblock print in your hands. It’ll be one of your treasured images transferred directly onto one of your favorite mounts.

When your mount is free of paper bits, apply a coat of varnish to protect the surface. It’ll help finish your new work of art. Choose whichever varnish that you prefer: shiny or matte.
This craft is one of the many ways to print on wood. As we mentioned earlier, you can also decoupage your images onto wooden mounts.
Woodblock printing is a similar process and a fantastic way to embellish or restore objects at home.
There are tons of ways to print; you just need to learn more about it if you’re interested in the technique. Doing crafts and restoring objects will also help you hone your creativity and clear your mind from worries.
