6 DIY Gifts for Babies
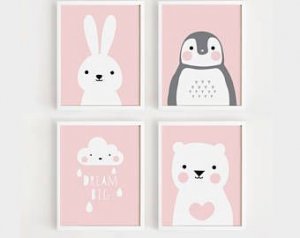
Deciding how to decorate a baby’s room is a difficult task since we have to create a magical and fairy-tale environment. Getting that dream-like environment isn’t easy. In this article, we want to show you some DIY gift ideas for decorating a little one’s room. You can also use them as a gift for a friend or family member who’s recently had a baby.
1. Light-up letters
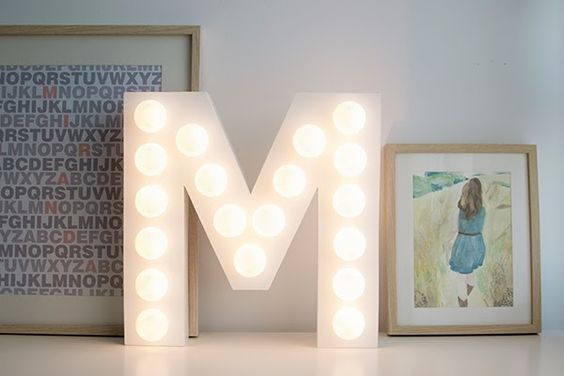
First, you have to get a large letter made of cardboard. If you don’t want to buy it, you can make it yourself. All you need is the cardboard from a box you already have at home.
Next, mark the points where you want the LED lights to go (you can find them at a bazaar or a craft store). You can make the holes with any sharp instrument like scissors, a razor cutter or even a corkscrew.
Once you’ve made the small holes, put the LED lights through them. You can stick them on with a hot glue gun.
If you find the finished product a bit bland, you can let your imagination run wild. Try painting it different colors, draw shapes or decorate it with colors.
2. Cushions for the cradle
It’s important to wash the cloth with special soap before making the cushion. Remember that the cushion will be in direct contact with the baby.
First, cut a rectangle of the fabric that you like best and that best compliments the baby’s room. The measures you should follow are 35 x 40 cm for the interior cushion. As for the printed fabric for the cover, you need to cut a rectangle measuring 35 x 55 cm.
Once you have cut them, fold the rectangle of the inner cushion in half. Turn the fabric inside out and sew one of the short sides and one of the longer sides. Then, turn it right side out, fill it with the cushion stuffing and sew the short side so that nothing comes out.
For the cover, make a hem on the short sides of the rectangles. Fold it in half and sew the longest side with the angles facing each other. Then, take the two pieces and put the cushion inside the cover.
When finishing the cushion, you can use your imagination. One idea is to sew them as if they were normal cushions.
This is, without a doubt, a very practical accessory that will be great for a baby’s crib.
3. Felt birds
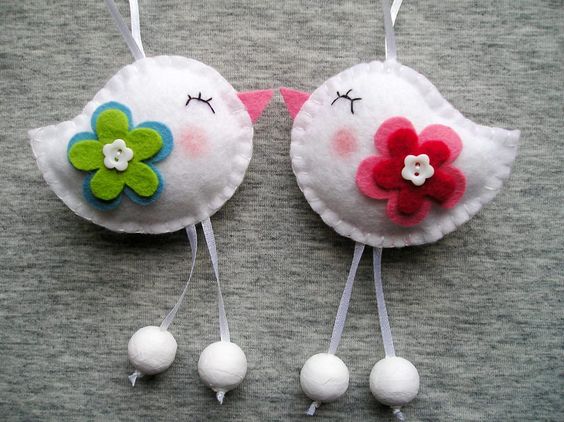
Of all the DIY gift ideas this is one of our favorites. First, draw a small circle on the felt using a bottle cap or something similar.
Next, draw three equal petals that will form a triangle when joined together. Sew two points in one of the petals using black thread to make the bird’s eyes. Under those, use your favorite thread to sew on the beak.
Cut two pieces of felt to form the wings and stick them on the side of the triangles. Then cut a triangle, later you’ll sew them into a tail.
4. Moon shaped rattle
Start by making a circle on a piece of material and then cut it out. Put the interlining underneath the circle. It should have the same measurements.
Embroider the eyes and mouth of the moon. Get inspired by looking at Pinterest images to make it easier for you.
Cut colorful ribbons that go well with the color of the moon to decorate the rattle. Fold the ribbons in half and wrap them around the moon’s face. You can use these later to hook on rubber circles so the baby can hold the rattle.
Sew both sides of the fabric circles almost all the way around, leaving a little space for the filling. After putting the filling inside, sew a few more stitches to close it. That’s it!
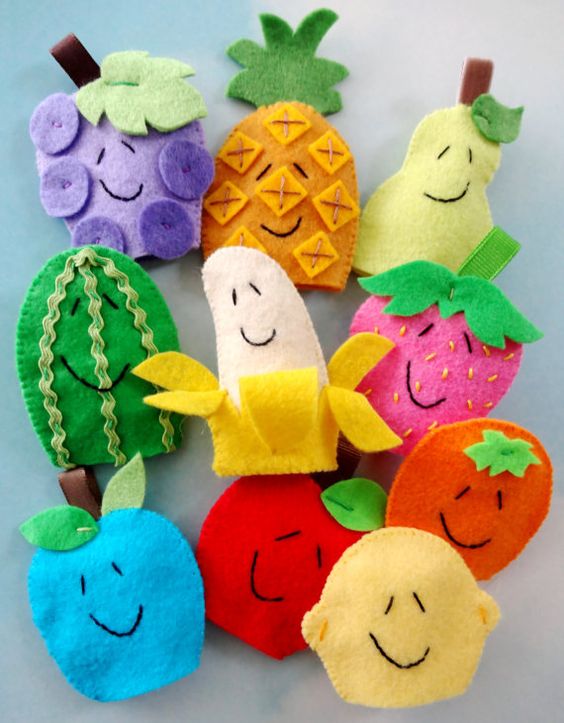
5. Finger puppets
First, get a glove that you’ll be able to decorate. Cut the fingers off the glove and put glue on the seams so they don’t fray.
Use googly eyes that you can find at a craft store. For his hair, use thick wool strips or pieces of cloth from something you don’t use anymore.
Now it’s time to use your imagination and just use everything that comes to mind. If you want to tell a story about princesses, make a puppet with a wool braid and a crown made of felt or cardboard.
On the other hand, if you want to make animals, you’ll have to be more meticulous with the detail of the ears, hair, legs, etc.
Finger puppets are fun and easy to make, but, above all, they’re entertaining for children.
6. Hot air balloons with cardboard
You can print a balloon pattern that you can find online or use one from a book.
Draw the balloon on different colored cardboard and cut it out. Use scissors or a razor blade to make a cut from the top to the middle of some balloons and from the bottom to the middle of others so that you can later fit them together.
Using glue or tape, stick the cut-out balloons together. Next, stick on the wool threads that will hold the balloons.
You can stick these to the wall or even make them into a mobile for the crib.
Are you ready to try any of these DIY gift ideas?
Deciding how to decorate a baby’s room is a difficult task since we have to create a magical and fairy-tale environment. Getting that dream-like environment isn’t easy. In this article, we want to show you some DIY gift ideas for decorating a little one’s room. You can also use them as a gift for a friend or family member who’s recently had a baby.
1. Light-up letters
First, you have to get a large letter made of cardboard. If you don’t want to buy it, you can make it yourself. All you need is the cardboard from a box you already have at home.
Next, mark the points where you want the LED lights to go (you can find them at a bazaar or a craft store). You can make the holes with any sharp instrument like scissors, a razor cutter or even a corkscrew.
Once you’ve made the small holes, put the LED lights through them. You can stick them on with a hot glue gun.
If you find the finished product a bit bland, you can let your imagination run wild. Try painting it different colors, draw shapes or decorate it with colors.

2. Cushions for the cradle
It’s important to wash the cloth with special soap before making the cushion. Remember that the cushion will be in direct contact with the baby.
First, cut a rectangle of the fabric that you like best and that best compliments the baby’s room. The measures you should follow are 35 x 40 cm for the interior cushion. As for the printed fabric for the cover, you need to cut a rectangle measuring 35 x 55 cm.
Once you have cut them, fold the rectangle of the inner cushion in half. Turn the fabric inside out and sew one of the short sides and one of the longer sides. Then, turn it right side out, fill it with the cushion stuffing and sew the short side so that nothing comes out.
For the cover, make a hem on the short sides of the rectangles. Fold it in half and sew the longest side with the angles facing each other. Then, take the two pieces and put the cushion inside the cover.
When finishing the cushion, you can use your imagination. One idea is to sew them as if they were normal cushions.
This is, without a doubt, a very practical accessory that will be great for a baby’s crib.
3. Felt birds
Of all the DIY gift ideas this is one of our favorites. First, draw a small circle on the felt using a bottle cap or something similar.
Next, draw three equal petals that will form a triangle when joined together. Sew two points in one of the petals using black thread to make the bird’s eyes. Under those, use your favorite thread to sew on the beak.
Cut two pieces of felt to form the wings and stick them on the side of the triangles. Then cut a triangle, later you’ll sew them into a tail.

4. Moon shaped rattle
Start by making a circle on a piece of material and then cut it out. Put the interlining underneath the circle. It should have the same measurements.
Embroider the eyes and mouth of the moon. Get inspired by looking at Pinterest images to make it easier for you.
Cut colorful ribbons that go well with the color of the moon to decorate the rattle. Fold the ribbons in half and wrap them around the moon’s face. You can use these later to hook on rubber circles so the baby can hold the rattle.
Sew both sides of the fabric circles almost all the way around, leaving a little space for the filling. After putting the filling inside, sew a few more stitches to close it. That’s it!
5. Finger puppets
First, get a glove that you’ll be able to decorate. Cut the fingers off the glove and put glue on the seams so they don’t fray.
Use googly eyes that you can find at a craft store. For his hair, use thick wool strips or pieces of cloth from something you don’t use anymore.
Now it’s time to use your imagination and just use everything that comes to mind. If you want to tell a story about princesses, make a puppet with a wool braid and a crown made of felt or cardboard.
On the other hand, if you want to make animals, you’ll have to be more meticulous with the detail of the ears, hair, legs, etc.
Finger puppets are fun and easy to make, but, above all, they’re entertaining for children.

6. Hot air balloons with cardboard
You can print a balloon pattern that you can find online or use one from a book.
Draw the balloon on different colored cardboard and cut it out. Use scissors or a razor blade to make a cut from the top to the middle of some balloons and from the bottom to the middle of others so that you can later fit them together.
Using glue or tape, stick the cut-out balloons together. Next, stick on the wool threads that will hold the balloons.
You can stick these to the wall or even make them into a mobile for the crib.
Are you ready to try any of these DIY gift ideas?
