Make your own Shoe Organizer with Old Crates
A crate shoe organizer is very practical. Thanks to old crates, you can organize and find your shoes much easier. You can find them at stores, but you can also make them yourself. That means you can enjoy a very economical shoe organizer that’s perfectly sized to fit the space that you have available. On top of that, it’ll have your preferred finish.
If you’re ready to make your own, read our steps below to make your own crate shoe organized that’s recycled and totally personalized.
Step 1: look for different kinds of crates
The first step for your crate shoe organizer is looking for different kinds of crates. The number of shoes that you want to organize, and how big they are, will determine the crate shapes and characteristics that you’ll need. We recommend using at least three different kinds of crates.
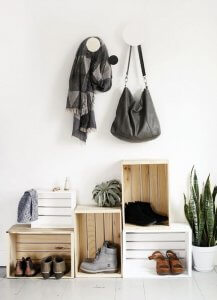
- Normal wooden crate. Your standard crate stood on top of one of its shorter sides, is perfect for holding tall boots. Setting the crate up on one of its longer sides will allow you to organize other shoes like sandals or sneakers.
- Wooden wine crates. These boxes come with a wooden divider that creates 8 or 12 separate compartments. Thus, they’re perfect for keeping low-volume footwear like baby shoes or flat sandals.
- Small wooden boxes. These boxes are optional. We love them because they add more originality and variety to the overall structure. They’re just as practical and break up the shape monotony other the previous examples.
Step 2: sand the crates
Once you’ve picked out your crates, you’ll need to give them a smooth finish. Sand each board on every box manually or with an electric sander.
Make sure that all of the nails and staples are in the right places and won’t do any damage. If you find a possibly dangerous nail, flatten it out with a hammer or remove and replace it.
Step 3: paint the crates or leave them as they are
Now that your wooden crates are nice and smooth, it’s time to treat them. Besides making them look nicer, paint and varnish help them last longer, protecting them from wear.
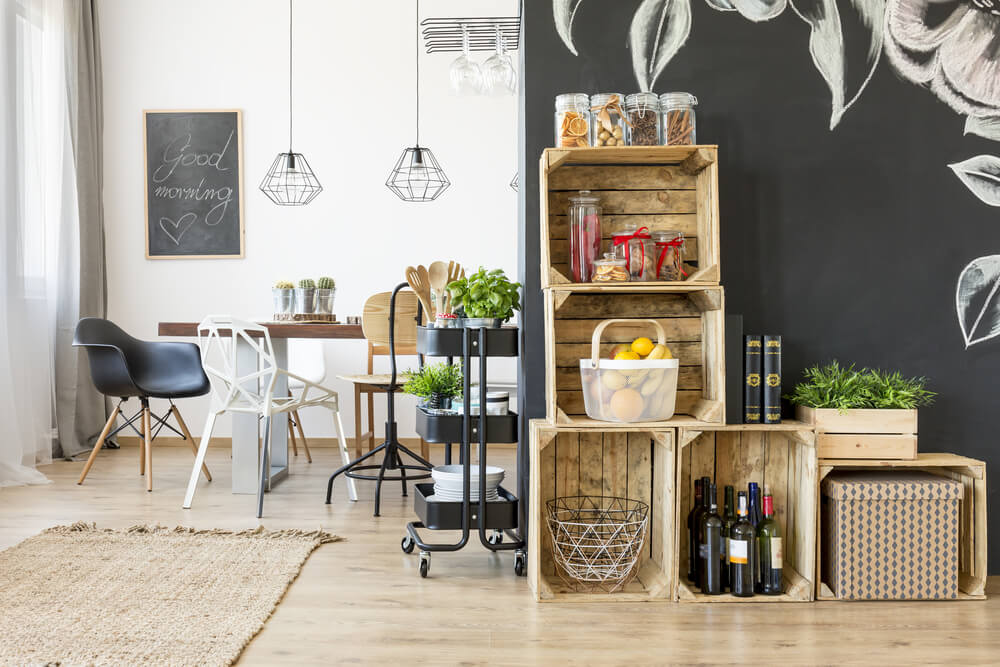
A simple coat of varnish could be enough to give your shoe organizer a shiny, natural finish.
Pick a color or a palette that goes with your room, your taste, and home decor. Whatever you choose, we recommend applying at least one coat of varnish to keep the wood in perfect condition.
Step 4: assemble the structure
Once your boxes are ready, you just need to assemble your organizer. To get started, mix around the different types of crates. The height and width of your organizer need to fit into the planned area as well as hold all of the shoes that you want to organize.
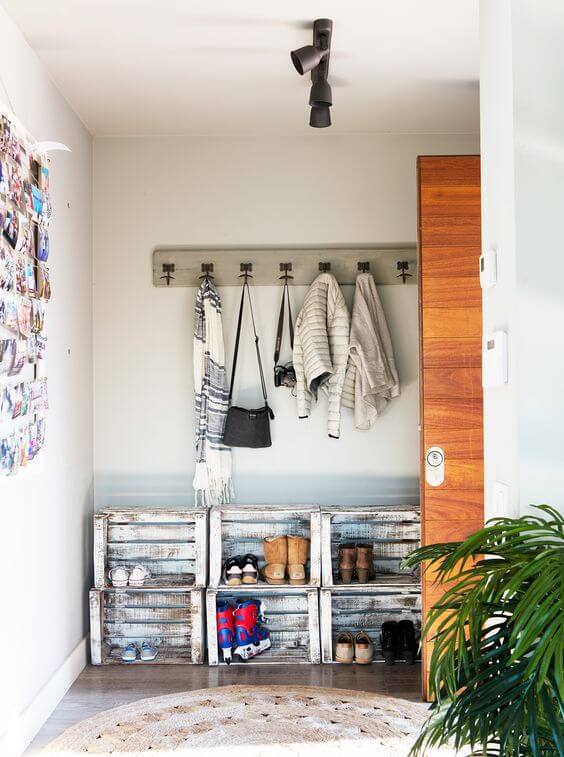
If you’re planning on making a small organizer that’s not too tall, you could stack the crates without fixing them onto a support. On the other hand, if you’re planning on a large organizer, or if you have children at home, you should fix the crates to the wall and to each other.
Use a glue that’s made for wood or nails to fix the crates in place. If you use nails, be extra careful because you could break the boxes if they’re older.
Step 5: let your shoe organizer do its thing!
Now you just need to add some life to your shoe organizer. Finally, it’s time to organize and put out all of your footwear that, until now, have been hiding away in boxes and impossible to find. Thanks to the different dividers, all of your footwear will have a place, making them easy to find.
Once again, DIY projects are a hit. You can really make your own personalized crate shoe organizer this easily and this economically.
A crate shoe organizer is very practical. Thanks to old crates, you can organize and find your shoes much easier. You can find them at stores, but you can also make them yourself. That means you can enjoy a very economical shoe organizer that’s perfectly sized to fit the space that you have available. On top of that, it’ll have your preferred finish.
If you’re ready to make your own, read our steps below to make your own crate shoe organized that’s recycled and totally personalized.
Step 1: look for different kinds of crates
The first step for your crate shoe organizer is looking for different kinds of crates. The number of shoes that you want to organize, and how big they are, will determine the crate shapes and characteristics that you’ll need. We recommend using at least three different kinds of crates.
- Normal wooden crate. Your standard crate stood on top of one of its shorter sides, is perfect for holding tall boots. Setting the crate up on one of its longer sides will allow you to organize other shoes like sandals or sneakers.
- Wooden wine crates. These boxes come with a wooden divider that creates 8 or 12 separate compartments. Thus, they’re perfect for keeping low-volume footwear like baby shoes or flat sandals.
- Small wooden boxes. These boxes are optional. We love them because they add more originality and variety to the overall structure. They’re just as practical and break up the shape monotony other the previous examples.
Step 2: sand the crates
Once you’ve picked out your crates, you’ll need to give them a smooth finish. Sand each board on every box manually or with an electric sander.
Make sure that all of the nails and staples are in the right places and won’t do any damage. If you find a possibly dangerous nail, flatten it out with a hammer or remove and replace it.
Step 3: paint the crates or leave them as they are
Now that your wooden crates are nice and smooth, it’s time to treat them. Besides making them look nicer, paint and varnish help them last longer, protecting them from wear.
A simple coat of varnish could be enough to give your shoe organizer a shiny, natural finish.
Pick a color or a palette that goes with your room, your taste, and home decor. Whatever you choose, we recommend applying at least one coat of varnish to keep the wood in perfect condition.
Step 4: assemble the structure
Once your boxes are ready, you just need to assemble your organizer. To get started, mix around the different types of crates. The height and width of your organizer need to fit into the planned area as well as hold all of the shoes that you want to organize.
If you’re planning on making a small organizer that’s not too tall, you could stack the crates without fixing them onto a support. On the other hand, if you’re planning on a large organizer, or if you have children at home, you should fix the crates to the wall and to each other.
Use a glue that’s made for wood or nails to fix the crates in place. If you use nails, be extra careful because you could break the boxes if they’re older.
Step 5: let your shoe organizer do its thing!
Now you just need to add some life to your shoe organizer. Finally, it’s time to organize and put out all of your footwear that, until now, have been hiding away in boxes and impossible to find. Thanks to the different dividers, all of your footwear will have a place, making them easy to find.
Once again, DIY projects are a hit. You can really make your own personalized crate shoe organizer this easily and this economically.


