Decoupage for Bigger Furniture Pieces
Today is all about a popular decor technique that restoration fans will adore – decoupage. Decoupage is a creative technique that stamps images on paper onto another surface.
You can use almost any kind of paper to get started. Feel free to leaf through magazines for images but paper napkins are usually the most popular resource.
Though decoupage offers endless decor possibilities, vintage or antique images work especially well. If you aren’t familiar with this technique, try starting out with small wooden boxes, trays or vases for your plants. And if you really want something special, try it on your furniture pieces.
The technique is also great because you can apply it to various surfaces such as wood, ceramic or glass. Let’s get started. You won’t believe how beautiful it’ll look on dresser drawers, a coffee table or nightstands.
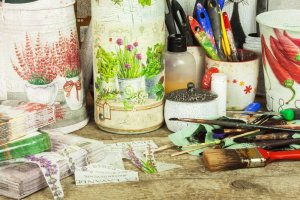
Materials

You won’t need many materials and they’re all easy to find. First, you’ll need paint to coat each furniture piece you want to decoupage. We especially love chalk paint because it doesn’t require a primer. Just look for a color that will match well with the image you plan on stamping onto the furniture piece’s surface.
We recommend using paper napkins for your decoupage images. They’re thinner and easier to work with than other resources but they look fabulous and are very economical. Not to mention, they’re perfect for nailing that French flair.
You’ll also need white glue or decoupage gel such as Mary Paint phototransfer. Don’t forget a big paintbrush as you’ll need it to apply the glue.
Make sure you use paintbrushes with soft bristles or you might rip your paper. You’ll also need a pair of scissors to cut the images out.
To finish and protect your decoupage, feel free to use the same glue that you used to attach the image onto the furniture piece. But you can also find all kinds of products that will give you a perfect finish, such as varnish or gloss that are specially made for decoupage.
Applying decoupage
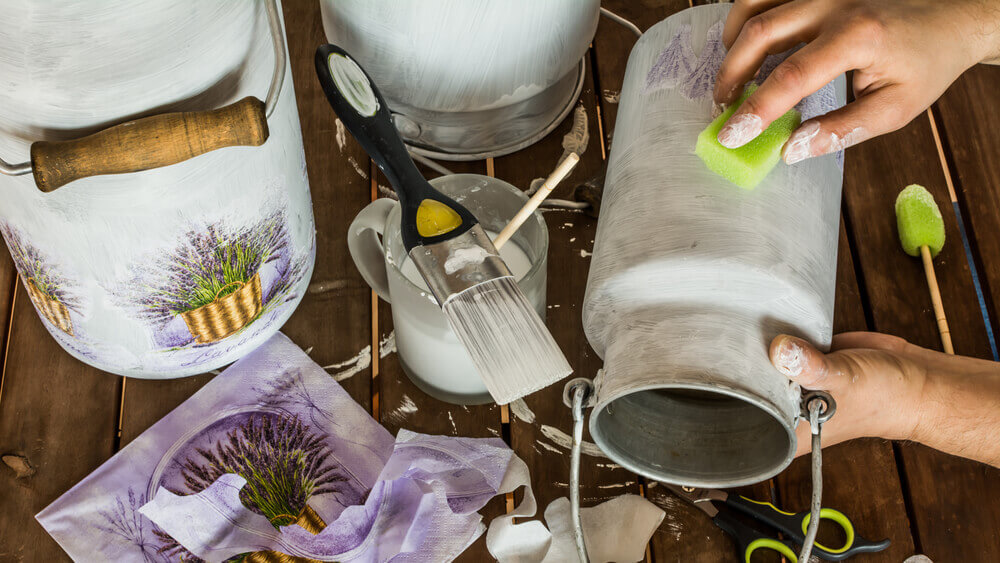
Once your base color is applied and dry, you can start decoupaging your images. Start by placing your paper with your image, or the cutout, onto the place that you want to embellish.
Lift up half of the image and apply the white glue with a paintbrush onto the side that will touch the surface. Next, repeat to the other half of the image. The image should be securely glued on at both ends.
Then, apply a coat of glue on top of the image to finish. Make sure that there are no air bubbles or wrinkles.
Let the glue dry before moving on to the next step. If not ready, your image can move or rip. When dry, you can now protect the paper with a coat of varnish or gloss.
Special tricks
The decoupage steps above will give you a basic finish. But there are plenty of tricks and finishes that you can use as well. While they’re not obligatory, they’re good to know.
- Ironing. The ironing technique will ensure a completely smooth application and a perfect finish. Iron the image after the glue has completed dried. Be sure to use an iron without steam to keep everything dry and free of marks. Place a sheet of parchment paper on top of the image and iron.
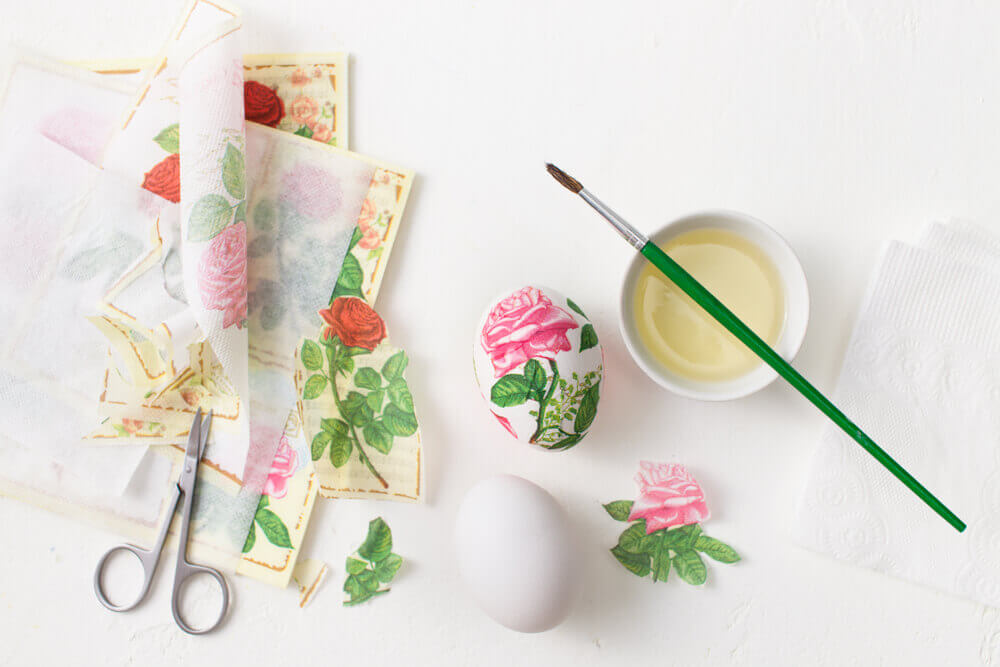
- Cutting napkins. If you aren’t planning on using an entire napkin and just want a certain section of it, separate the layers first. Separating the layers will make it much easier to cut out the image.
- The best surfaces for decoupage are wood, glass, ceramic and metal. If you want to work on wood, we recommend lightly sanding down the area first. Meanwhile, for glass, use a napkin that isn’t too light in color or the image may be difficult to see. Lastly, if you want to work on metal, use bright colors to decoupage as metal tends to darken the image.
Today is all about a popular decor technique that restoration fans will adore – decoupage. Decoupage is a creative technique that stamps images on paper onto another surface.
You can use almost any kind of paper to get started. Feel free to leaf through magazines for images but paper napkins are usually the most popular resource.
Though decoupage offers endless decor possibilities, vintage or antique images work especially well. If you aren’t familiar with this technique, try starting out with small wooden boxes, trays or vases for your plants. And if you really want something special, try it on your furniture pieces.
The technique is also great because you can apply it to various surfaces such as wood, ceramic or glass. Let’s get started. You won’t believe how beautiful it’ll look on dresser drawers, a coffee table or nightstands.
Materials
You won’t need many materials and they’re all easy to find. First, you’ll need paint to coat each furniture piece you want to decoupage. We especially love chalk paint because it doesn’t require a primer. Just look for a color that will match well with the image you plan on stamping onto the furniture piece’s surface.
We recommend using paper napkins for your decoupage images. They’re thinner and easier to work with than other resources but they look fabulous and are very economical. Not to mention, they’re perfect for nailing that French flair.
You’ll also need white glue or decoupage gel such as Mary Paint phototransfer. Don’t forget a big paintbrush as you’ll need it to apply the glue.
Make sure you use paintbrushes with soft bristles or you might rip your paper. You’ll also need a pair of scissors to cut the images out.
To finish and protect your decoupage, feel free to use the same glue that you used to attach the image onto the furniture piece. But you can also find all kinds of products that will give you a perfect finish, such as varnish or gloss that are specially made for decoupage.
Applying decoupage
Once your base color is applied and dry, you can start decoupaging your images. Start by placing your paper with your image, or the cutout, onto the place that you want to embellish.
Lift up half of the image and apply the white glue with a paintbrush onto the side that will touch the surface. Next, repeat to the other half of the image. The image should be securely glued on at both ends.
Then, apply a coat of glue on top of the image to finish. Make sure that there are no air bubbles or wrinkles.
Let the glue dry before moving on to the next step. If not ready, your image can move or rip. When dry, you can now protect the paper with a coat of varnish or gloss.
Special tricks
The decoupage steps above will give you a basic finish. But there are plenty of tricks and finishes that you can use as well. While they’re not obligatory, they’re good to know.
- Ironing. The ironing technique will ensure a completely smooth application and a perfect finish. Iron the image after the glue has completed dried. Be sure to use an iron without steam to keep everything dry and free of marks. Place a sheet of parchment paper on top of the image and iron.
- Cutting napkins. If you aren’t planning on using an entire napkin and just want a certain section of it, separate the layers first. Separating the layers will make it much easier to cut out the image.
- The best surfaces for decoupage are wood, glass, ceramic and metal. If you want to work on wood, we recommend lightly sanding down the area first. Meanwhile, for glass, use a napkin that isn’t too light in color or the image may be difficult to see. Lastly, if you want to work on metal, use bright colors to decoupage as metal tends to darken the image.
All cited sources were thoroughly reviewed by our team to ensure their quality, reliability, currency, and validity. The bibliography of this article was considered reliable and of academic or scientific accuracy.


