Make your Own Invitations in 3 Easy Steps
With the rise of technology, the humble paper invitation has slowly begun to disappear from our daily lives. However, many people still choose to make their own invitations, either printing them or writing them out by hand.
There’s a huge variety of styles to choose from, so you can find one to suit any event or occasion. Whether a wedding, a baptism, baby shower, birthday, or anniversary, there really is something for everything.
Obviously, the style of your invitations should reflect the type of event you’re celebrating. You could also choose the colors so that they match the color scheme of your venue. So, while making your own invitations for family and friends might be a fun and original idea, it can be a lot of work.
In this article, we’ll show you how to make your own invitations, some of the different decorations you can add, as well as the various shapes and styles you can choose from.
How to make your own invitations
1. Choose the layout
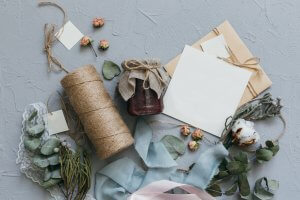
If you want to make your own invitations, there are a few different materials you’re going to need. You can either make them completely by hand or print out the information and then decorate the card. This second option is much more practical, as writing every invitation out separately can take a lot of time. You’ll need the following materials:
- Colored or patterned paper
- Card
- A rule or set square
- Scissors
- Pen
- A fine-tipped marker
- Thread, ribbon or other decorative items
- A hole punch
- A glue stick
2. Print out the information
We would recommend designing your cards on a computer, choosing the font and format you like best. That way, you’ll simply need to print it out, cut it down to size, and glue it to your chosen paper or card. You can then go on to decorate however you want.
Invitations don’t necessarily need to be square or rectangular; they can also be circular, oval, triangular, or any other shape you like. You can also make an envelope or a small stand where your guests can display their invitations.
3. Add decoration
Adding small, simple decorations is the perfect way to give your invitations that finishing touch. In this next section, we’ll show you some interesting ways to do it.
Hand-sewn decorations
If you’re looking to give your invitations a handmade feel, you could sew a decorative border around the edge of the card. Take a length of waxed thread in your chosen color and use a running stitch to create your border. For best results, we would recommend choosing a color that contrasts with the color of the card.
Add decorative ribbon
Delicate and understated, people often use ribbon to decorate their invitations. You can incorporate ribbon of all different colors, using a range of different fabrics, such as lace and satin. There’s a huge variety to choose from, so you can pick the one that best suits the aesthetic you’re going for.
Miniature bunting
One really beautiful option is to make decorative bunting for your cards. First, use your hole punch to make two small holes at the top of your card, one in each corner. Then, take some fine cotton thread and loop it through the holes, tying the ends together at the back. Finally, cut out some small triangles in a different colored card and glue them along the entire length of the thread. And there you have it: some beautiful miniature bunting.
Special invitations
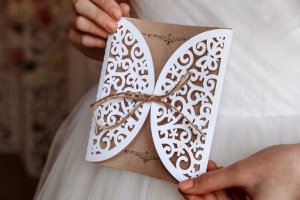
While the most classical format is obviously the square or rectangular invitation, you could also use some more unconventional shapes to make your DIY invitations. For example, you could make a gate-fold card like the one below, that opens up to reveal the information beneath. You could even make 3-D invitations, that pop up when you open the card.
Color-coordinated invitations
The type of event you’re throwing will dictate the aesthetic, theme and colors that you use for your invitations. So, in this section, we want to give you a few ideas to keep in mind when making your cards.
Wedding invites
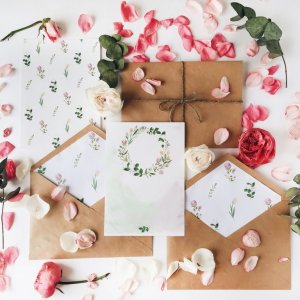
Neutral colors such as white, black, gray and cream are ideal for wedding invitations. However, you can use decorations to add small touches of color. Lace and silk ribbons are really popular options for wedding invitations, giving the cards a delicate and elegant look.
Children’s events
Pastel colors are perfect for children’s birthday parties, sixteenth birthday celebrations, baby showers, and baptisms. Plus, you can even incorporate themed images, die-cut patterns and use bright, cheerful tones.
Sweet sixteen invitations
When it comes to sweet sixteen birthday celebrations, it’s best to adapt the cards to match the theme and tone of the party. Because both the guests and the host will be teenagers, you can give these cards a really fun and relaxed feel.
As you can see, there are so many great ways to make your own invitations. All you need to do is choose the colors and theme that best suit your event. Let your creative juices flow, and have fun making invitations for that special occasion.
With the rise of technology, the humble paper invitation has slowly begun to disappear from our daily lives. However, many people still choose to make their own invitations, either printing them or writing them out by hand.
There’s a huge variety of styles to choose from, so you can find one to suit any event or occasion. Whether a wedding, a baptism, baby shower, birthday, or anniversary, there really is something for everything.
Obviously, the style of your invitations should reflect the type of event you’re celebrating. You could also choose the colors so that they match the color scheme of your venue. So, while making your own invitations for family and friends might be a fun and original idea, it can be a lot of work.
In this article, we’ll show you how to make your own invitations, some of the different decorations you can add, as well as the various shapes and styles you can choose from.
How to make your own invitations
1. Choose the layout
If you want to make your own invitations, there are a few different materials you’re going to need. You can either make them completely by hand or print out the information and then decorate the card. This second option is much more practical, as writing every invitation out separately can take a lot of time. You’ll need the following materials:
- Colored or patterned paper
- Card
- A rule or set square
- Scissors
- Pen
- A fine-tipped marker
- Thread, ribbon or other decorative items
- A hole punch
- A glue stick
2. Print out the information
We would recommend designing your cards on a computer, choosing the font and format you like best. That way, you’ll simply need to print it out, cut it down to size, and glue it to your chosen paper or card. You can then go on to decorate however you want.
Invitations don’t necessarily need to be square or rectangular; they can also be circular, oval, triangular, or any other shape you like. You can also make an envelope or a small stand where your guests can display their invitations.
3. Add decoration
Adding small, simple decorations is the perfect way to give your invitations that finishing touch. In this next section, we’ll show you some interesting ways to do it.
Hand-sewn decorations
If you’re looking to give your invitations a handmade feel, you could sew a decorative border around the edge of the card. Take a length of waxed thread in your chosen color and use a running stitch to create your border. For best results, we would recommend choosing a color that contrasts with the color of the card.
Add decorative ribbon
Delicate and understated, people often use ribbon to decorate their invitations. You can incorporate ribbon of all different colors, using a range of different fabrics, such as lace and satin. There’s a huge variety to choose from, so you can pick the one that best suits the aesthetic you’re going for.
Miniature bunting
One really beautiful option is to make decorative bunting for your cards. First, use your hole punch to make two small holes at the top of your card, one in each corner. Then, take some fine cotton thread and loop it through the holes, tying the ends together at the back. Finally, cut out some small triangles in a different colored card and glue them along the entire length of the thread. And there you have it: some beautiful miniature bunting.
Special invitations
While the most classical format is obviously the square or rectangular invitation, you could also use some more unconventional shapes to make your DIY invitations. For example, you could make a gate-fold card like the one below, that opens up to reveal the information beneath. You could even make 3-D invitations, that pop up when you open the card.
Color-coordinated invitations
The type of event you’re throwing will dictate the aesthetic, theme and colors that you use for your invitations. So, in this section, we want to give you a few ideas to keep in mind when making your cards.
Wedding invites
Neutral colors such as white, black, gray and cream are ideal for wedding invitations. However, you can use decorations to add small touches of color. Lace and silk ribbons are really popular options for wedding invitations, giving the cards a delicate and elegant look.
Children’s events
Pastel colors are perfect for children’s birthday parties, sixteenth birthday celebrations, baby showers, and baptisms. Plus, you can even incorporate themed images, die-cut patterns and use bright, cheerful tones.
Sweet sixteen invitations
When it comes to sweet sixteen birthday celebrations, it’s best to adapt the cards to match the theme and tone of the party. Because both the guests and the host will be teenagers, you can give these cards a really fun and relaxed feel.
As you can see, there are so many great ways to make your own invitations. All you need to do is choose the colors and theme that best suit your event. Let your creative juices flow, and have fun making invitations for that special occasion.


