How to Make Your Own DIY Knife Holder

The knife holder is a common household item, and is very useful when it comes to storing and arranging sharp kitchen knives.
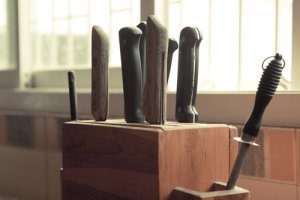
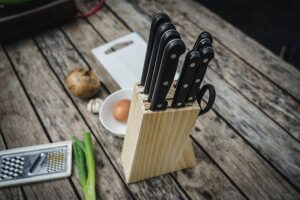
Knife holders can be divided into two main categories. They can be wall-mounted (made up of a metal or wooden strip which can be attached to the wall, while hooks or magnets are used to store the knives) or a block (an angled block of wood with holes or slots where the knives can be stored).
Knife block vs. wall-mounted knife holder
Though it’s true that since the magnetic wall-mounted knife holder arrived, they have become the number one choice for many people, the simple wooden knife block continues to be a popular choice.
The model you choose will largely depend on aesthetics. One model might be better suited to a certain decor style than another.
However, it’s worth mentioning that there are many models that combine modern storage solutions with a more rustic look, as is the case with magnetic wall-mounted wooden knife holders.
Which model is best – pros and cons

The advantage of magnetic knife holders is that they allow you to hang other kitchen utensils too, helping you to save valuable storage space. Having a clear space to work when preparing meals is always a bonus. Other advantages include:
- They have a long lifespan
- Low maintenance.
- They allow you to keep all your utensils close-by when you need them.
- Your utensils will stay in better condition than they would if kept in a drawer, where they can easily get damaged.
- You can see all your knives easily, allowing you to choose the best one for the task.
The main disadvantage of using utensil holders consisting of a single container is that they tend to get cluttered and messy easily, making it more difficult to extract the item you need.
How to make your own magnetic wall-mounted knife holder
Materials
- 1 ruler
- Drill
- 1 3/4″ Forstner drill bit
- Hammer
- Glue
- 4 small nails
- 2 metal brackets
- 1 white or silver pen
- 1 can of wood varnish or lacquer
- Several 3/4″ round industrial magnets
- One piece of wood (should be at least 3/4″ wide and 2″ tall)
Instructions
- Take your block of wood and draw two horizontal parallel lines, so that you divide the block into thirds.
- Measure the block with a ruler, and mark out the location of each of your holes, placing them equidistant to one another. The number of holes you make will depend on the length of the block.
- Next, use the drill to make two rows of 3/4″ holes in the wood. Be very careful, and be sure not to drill all the way through the wood.
- Dab super glue into each of the holes and place a magnet in each one. Leave it a few minutes to allow the glue to dry.
- Apply a coat of varnish and leave it to dry.
- Attach two brackets to the back of the block of wood so that you can hang your knife holder on the wall. Make sure the brackets are equidistant to one another.

Make your own knife holder – some creative ideas
Instead of following the steps detailed above, there are a number of simpler options you could use. Unlike the wall-mounted knife holder and the classic knife block, the following ideas are more temporary solutions.
- Take a glass jar or other container and fill it half-way with dried beans. Then, simply place the knives in the jar, blade-down. And there you have it!
- Buy a magnetic strip, decorate it (with spray paint, stickers, etc.), and fix it to your kitchen wall. It’s important to mention that this option cannot be used to store a large number of utensils, as it can easily fall down if overloaded.
- Take a wooden box 12-16″ high and 3″ wide and fill it with wooden chopsticks. Your knives will easily slide into the container and remain upright, leaving only the handles visible.
One final option
There is also a third option when it comes to making your own knife holders. However, it isn’t very common. This stainless steel holder is comprised of a metal bar and basket, where you can store your utensils. The basket can then be fixed to the wall, keeping it out of the way and saving you on valuable kitchen space.
The knife holder is a common household item, and is very useful when it comes to storing and arranging sharp kitchen knives.
Knife holders can be divided into two main categories. They can be wall-mounted (made up of a metal or wooden strip which can be attached to the wall, while hooks or magnets are used to store the knives) or a block (an angled block of wood with holes or slots where the knives can be stored).
Knife block vs. wall-mounted knife holder
Though it’s true that since the magnetic wall-mounted knife holder arrived, they have become the number one choice for many people, the simple wooden knife block continues to be a popular choice.
The model you choose will largely depend on aesthetics. One model might be better suited to a certain decor style than another.
However, it’s worth mentioning that there are many models that combine modern storage solutions with a more rustic look, as is the case with magnetic wall-mounted wooden knife holders.
Which model is best – pros and cons

The advantage of magnetic knife holders is that they allow you to hang other kitchen utensils too, helping you to save valuable storage space. Having a clear space to work when preparing meals is always a bonus. Other advantages include:
- They have a long lifespan
- Low maintenance.
- They allow you to keep all your utensils close-by when you need them.
- Your utensils will stay in better condition than they would if kept in a drawer, where they can easily get damaged.
- You can see all your knives easily, allowing you to choose the best one for the task.
The main disadvantage of using utensil holders consisting of a single container is that they tend to get cluttered and messy easily, making it more difficult to extract the item you need.
How to make your own magnetic wall-mounted knife holder
Materials
- 1 ruler
- Drill
- 1 3/4″ Forstner drill bit
- Hammer
- Glue
- 4 small nails
- 2 metal brackets
- 1 white or silver pen
- 1 can of wood varnish or lacquer
- Several 3/4″ round industrial magnets
- One piece of wood (should be at least 3/4″ wide and 2″ tall)
Instructions
- Take your block of wood and draw two horizontal parallel lines, so that you divide the block into thirds.
- Measure the block with a ruler, and mark out the location of each of your holes, placing them equidistant to one another. The number of holes you make will depend on the length of the block.
- Next, use the drill to make two rows of 3/4″ holes in the wood. Be very careful, and be sure not to drill all the way through the wood.
- Dab super glue into each of the holes and place a magnet in each one. Leave it a few minutes to allow the glue to dry.
- Apply a coat of varnish and leave it to dry.
- Attach two brackets to the back of the block of wood so that you can hang your knife holder on the wall. Make sure the brackets are equidistant to one another.

Make your own knife holder – some creative ideas
Instead of following the steps detailed above, there are a number of simpler options you could use. Unlike the wall-mounted knife holder and the classic knife block, the following ideas are more temporary solutions.
- Take a glass jar or other container and fill it half-way with dried beans. Then, simply place the knives in the jar, blade-down. And there you have it!
- Buy a magnetic strip, decorate it (with spray paint, stickers, etc.), and fix it to your kitchen wall. It’s important to mention that this option cannot be used to store a large number of utensils, as it can easily fall down if overloaded.
- Take a wooden box 12-16″ high and 3″ wide and fill it with wooden chopsticks. Your knives will easily slide into the container and remain upright, leaving only the handles visible.
One final option
There is also a third option when it comes to making your own knife holders. However, it isn’t very common. This stainless steel holder is comprised of a metal bar and basket, where you can store your utensils. The basket can then be fixed to the wall, keeping it out of the way and saving you on valuable kitchen space.


