Colored Pencil Vase

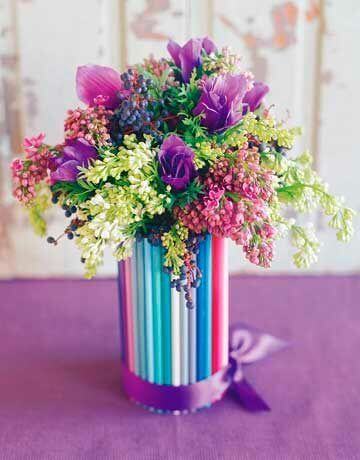
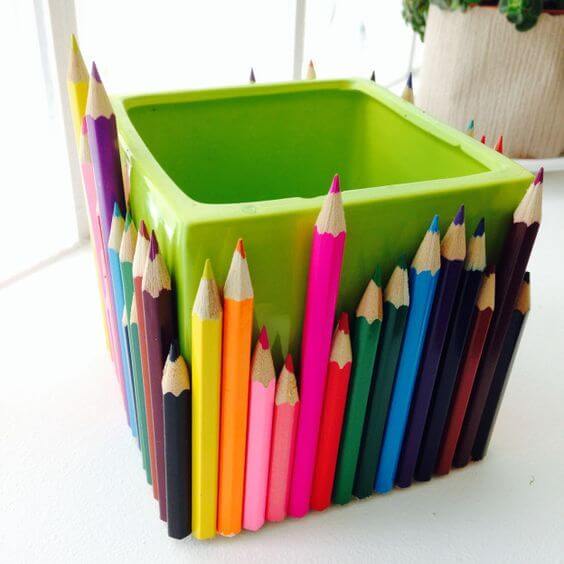
You can reuse corks, plastic or glass bottles and other similar objects to decorate and create original accessories. Additionally, a really interesting idea is to make a colored pencil vase. While colored pencils might seem childish, they can actually look quite beautiful and sophisticated when used in the right way.
On a further note, you’re not limited to pencils that have a colorful barrel. You could also use natural wood colored pencils. It all depends on the kind of setting that you want to create as well as the main material or color.
Below, we have some creative ideas to show you so that you can create your own colored pencil vase. Give it a try and use them for something different!
Uniform barrel colored pencils vase
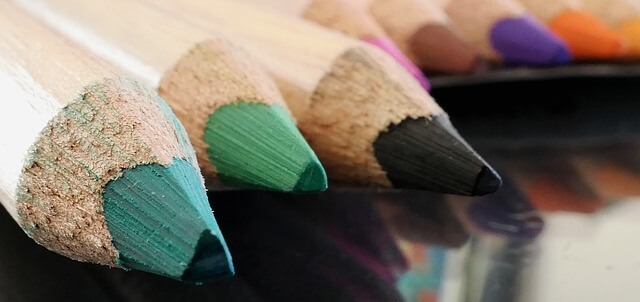
Uniform barrel colored pencils, or those that all have the same outward appearance, are great for creating an original, yet subtle, accessory. You can choose from white, black, light or dark wood barrels.
If y, make sure that your pencils are similar in size. Now, to get started on the vase, you’ll just need the following materials:
- Colored pencils
- Superglue
- 1 vase or container
Different ways to make a colored pencil vase
There are different ways to make a colored pencil vase. Some of the simpler ways are the following:
- Using similarly-sized colored pencils
- Using differently-sized colored pencils
- Positioning them horizontally/vertically
- Colors: using colored pencils in two specific colors, all colors, cold or warm colors, only your favorite colors, etc.
Alternatively, you can also pick out two colors for your vase. For example, a lilac and violet vase would look lovely and even more so with several springs of lavender.
1. Uniformly sized colored pencil vase
Materials
- 1 paintbrush
- Superglue
- 1 vase or container
- Colored pencils
- Optional: transparent varnish
Steps
First, measure the vase and make sure that the colored pencils can cover it completely. Then, paint a thin layer of glue onto the vase.
Next, stick on the pencils one at a time, ensuring that there aren’t any gaps between them. Press them on firmly to ensure that they’re securely attached. When you’re finished, leave the vase to dry for several hours. You can give it a layer of varnish for a shiny finish.
2. Cut colored pencil vase
Materials
- Sandpaper
- Superglue
- Colored pencils
- Box cutter or knife
- 1 vase or container
Steps
Start by cutting the ends off the colored pencils with the box cutter. After, sand the cut surface down until they’re flat and uniform.
Now, glue the pencils onto the vase, one by one. Stick them on firmly to make sure that they are securely attached. It’s crucial that you let the vase dry for several hours to ensure that they stay on the vase.
Make your own creations
Colored pencil vases can look gorgeous on a shelf in your office or in a similar area. Just make sure not to keep too many items inside the vase or it could tip over. Be extra careful if the vase’s interior is paper or cardboard.
Feel free to fill your vase with pens, paintbrushes, quills, origami (flowers or anything else), etc.
You can also use these colored pencil vases to hold pencils, markers, scissors or other objects like knitting needles.
You can reuse corks, plastic or glass bottles and other similar objects to decorate and create original accessories. Additionally, a really interesting idea is to make a colored pencil vase. While colored pencils might seem childish, they can actually look quite beautiful and sophisticated when used in the right way.
On a further note, you’re not limited to pencils that have a colorful barrel. You could also use natural wood colored pencils. It all depends on the kind of setting that you want to create as well as the main material or color.
Below, we have some creative ideas to show you so that you can create your own colored pencil vase. Give it a try and use them for something different!
Uniform barrel colored pencils vase

Uniform barrel colored pencils, or those that all have the same outward appearance, are great for creating an original, yet subtle, accessory. You can choose from white, black, light or dark wood barrels.
If y, make sure that your pencils are similar in size. Now, to get started on the vase, you’ll just need the following materials:
- Colored pencils
- Superglue
- 1 vase or container
Different ways to make a colored pencil vase
There are different ways to make a colored pencil vase. Some of the simpler ways are the following:
- Using similarly-sized colored pencils
- Using differently-sized colored pencils
- Positioning them horizontally/vertically
- Colors: using colored pencils in two specific colors, all colors, cold or warm colors, only your favorite colors, etc.
Alternatively, you can also pick out two colors for your vase. For example, a lilac and violet vase would look lovely and even more so with several springs of lavender.
1. Uniformly sized colored pencil vase
Materials
- 1 paintbrush
- Superglue
- 1 vase or container
- Colored pencils
- Optional: transparent varnish
Steps
First, measure the vase and make sure that the colored pencils can cover it completely. Then, paint a thin layer of glue onto the vase.
Next, stick on the pencils one at a time, ensuring that there aren’t any gaps between them. Press them on firmly to ensure that they’re securely attached. When you’re finished, leave the vase to dry for several hours. You can give it a layer of varnish for a shiny finish.

2. Cut colored pencil vase
Materials
- Sandpaper
- Superglue
- Colored pencils
- Box cutter or knife
- 1 vase or container
Steps
Start by cutting the ends off the colored pencils with the box cutter. After, sand the cut surface down until they’re flat and uniform.
Now, glue the pencils onto the vase, one by one. Stick them on firmly to make sure that they are securely attached. It’s crucial that you let the vase dry for several hours to ensure that they stay on the vase.

Make your own creations
Colored pencil vases can look gorgeous on a shelf in your office or in a similar area. Just make sure not to keep too many items inside the vase or it could tip over. Be extra careful if the vase’s interior is paper or cardboard.
Feel free to fill your vase with pens, paintbrushes, quills, origami (flowers or anything else), etc.
You can also use these colored pencil vases to hold pencils, markers, scissors or other objects like knitting needles.


