Photo to Wood Transfer in Four Steps

In today’s article, we’re going to give you the steps on how to do photo to wood transfer. It’s a very original way to highlight your favorite photos or those with sentimental value.
This is a fairly simple process, as you’re about to find out, so don’t worry, anybody can do it as long as you follow these instructions. To begin you’ll only need a photocopy of the photo you wish to transfer, some wooden board (you can use other materials such as canvas, glass, metals or other fabrics), glue or gel for image transfer and a brush to apply it, and a spatula.
If you don’t currently have these materials, you can easily get them at local craft stores. Then, just concentrate on selecting the picture you’re going to transfer.
Very importantly, keep in mind that when you transfer an image the final result will be a reflection of it that is reversed. So if you wish to keep it in the original orientation then you must print a mirror image of it, to begin with, so it turns out just the way you want it.
Here are the steps for doing your photo to wood transfer and some tips to keep in mind.
Photo to wood transfer
1. Apply the gel to the wood

You can easily find transfer gel at any local craft store or online. As soon as you have all your materials ready apply a coat over the entire surface of the wood with your brush. Make sure it’s evenly distributed throughout the surface.
In the introduction of this article, we mentioned that you would need a spatula or something similar. If you don’t have one then use a plastic bank card you no longer need or something along those lines. Anything rigid like a credit or library card will do.
2. Place your picture on the wood
Once you have brushed the gel onto the wood, place the photograph you selected on top of it. Paste it carefully so there are no wrinkles or air bubbles underneath, so do it very slowly. Begin at a corner and work your way down from there.
Obviously, the picture must be facing down so that the image is on the side of the wood surface that was previously covered with the transfer gel.
It doesn’t matter what type of photo you choose, it could be a landscape or a tribal photograph. And, the same goes for color – sepia, black and white, color, etc. Any of them will work.
3. Wait for a few hours
After you’ve pasted your photograph and have it exactly as you want it on the wood, let it dry completely. This will take a few hours
Read the gel instructions carefully. Because the drying time varies from one brand to another. With some, you have to wait up to 24 hours.
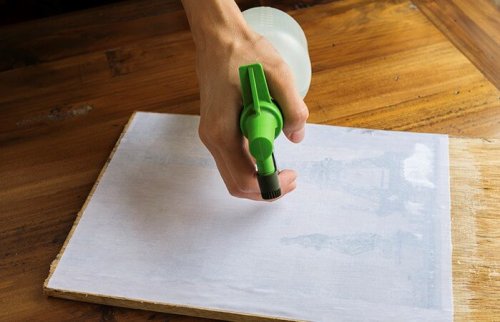
4. Photo to wood transfer – remove the paper
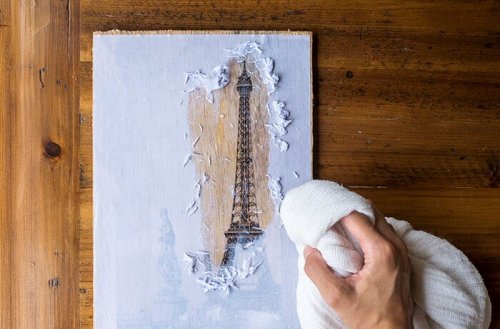
When the photo is completely dry, then it’s time to remove the paper from the wooden board. You must do so slowly and very carefully. Use a damp cloth or a sponge for this purpose.
You peel off the paper gradually until you remove it entirely. If you spray it with water then it will detach more easily. This is why it is important for you to print a photo on thinner paper, as photo paper would be harder to remove.
Finally, if you wish to attain a brighter finish, you can apply another coat of gel on the transferred surface.
If you liked this method for adding decor to your walls and you’re the handy type then you might also like to get into woodblock printing. These kinds of unique crafts will definitely give your walls an innovative and more original touch.
We hope you’ve enjoyed this article.