Patchwork Quilt: Create One Yourself With Scraps

Creating quilts, blankets and bedspreads with scraps is an activity that comes from a long line of tradition. Learn how to make your own bedspread or quilt with assorted pieces of fabric.
To feel comfortable and be able to rest properly, we must personalize our bedroom with textures and colors that please us. If you want to engage in a fun activity and you also need a new bedspread or quilt, you’re in the right place. In this article we’ll give you some creative ideas about how to make your own bedspread with different pieces of fabric.
If you follow the guidelines correctly, you’ll easily be able to give a second life to fabrics that you no longer use. Recycling is actually a great idea and is important when we think about reducing our environmental footprint.
Picking your fabric
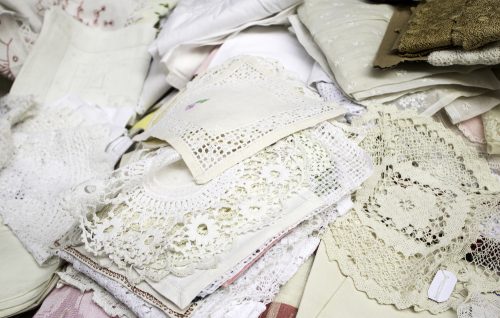
The first thing you should do is gather all the fabric that you want to incorporate into your quilt that’s sitting around your home. Use fabric that you would otherwise throw away. You can use old clothes and sheets or curtains that you no longer use. You can also ask family and friends to help you collect old textiles from their own homes.
Look at and analyze the material well. Remember that this is going to end up on your bed. For this reason it should be as soft as possible. If the texture is rough or uncomfortable, get rid of it. This will only irritate your skin.
Choose the right colors and textures
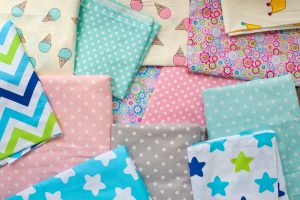
Once you’ve collected a decent amount of fabric, choose the ones that you like most. Try to combine solid and patterned pieces. Use your favorite colors and imagine how you’re going to place them together so that the result is aesthetically pleasing.

Materials you’ll need
To create your quilt with remnants or scraps in the most comfortable way, you’ll need the following materials:
- Measuring tape
- Scissors
- Thread
- Needle
- Pins
- Paper adhesive tape
- Ballpoint pen or pencil
- Sewing machine (optional)
- Wide table
- Griddle
This is all you’ll need to create the best quilt possible.
Take measurements
Once you’ve chosen your favorite pieces of fabric, you should proceed to measure the size of the quilt or bedspread that you already have on your bed. Pay attention here! You can either make your new quilt the same size or larger than the one you already have. Take final measurements with your tape measure. Write them down so you don’t forget them.
Cut the pieces of fabric
The great thing about DIY projects is that there aren’t any strict rules that you need to follow. You can choose to cut squares, triangles, or rectangles of different sizes. You can simply cut each piece of fabric into the same shape and size. You’ll have to make a decision about how to cut your fabric based on the sizes of fabric that you already have.
Do a test before sewing
Before joining all the pieces together, do a test run. First, put the pieces together and arrange them in the way you want to sew them. Play with the colors and sizes. Don’t forget that you need to take into account the total size of your bedspread or quilt. You should do this trial run so that you don’t make mistakes while sewing. If you have a guide, things will be much easier and you’ll know that you won´t make any errors.
On each side of the quilt, stick a small piece of tape with the corresponding number or letter. This way you’ll know which patch you’re supposed to place next to another and you can keep things organized. On the other hand, if you want to let your imagination go, you can improvise and join the pieces and mix them randomly, depending on what you see fit.
Proceed to join the pieces
Once you’re done with the test, proceed to sew each of the pieces together to create the quilt. Remember that you should always leave 0.5 cm of seam allowance on each piece. If you don’t take this into account, your bedspread or quilt will be smaller than you want it to be.
We recommend you do this with a sewing machine. If you don’t have one and you know how to sew by hand, don’t worry, you can go this route.
Sew all the pieces together depending on their shape. You’ll have to hold each piece and place it correctly. You position it on the opposite or “wrong” side. Therefore, you’ll do the stitching on the lower face of the surface. Try to control the measurements as you add each patch to the quilt. That way you’ll keep things even and it’ll be the size that you want it to be.
Remember, if you want to perform this procedure by sewing manually it’ll take you more time. Ideally, use a thicker thread to reinforce the seams. Otherwise you run the risk of the fabric falling apart.

Iron your quilt
When you’ve finished putting all the pieces together, you’ll have completed your bedspread. Then you must iron the entire surface to set the seams.
Underlay the base fabric
If you wish, once you’ve finished the above procedure, you can line your bedspread with a smooth fabric. An easy option is to use a sheet that you already have for the lining. Sew the lining to the underside of your bedspread. This way you’ll hide the seams and it’ll give a softer feeling.
Wash it
If you’ve been working with your quilt for a long time, we recommend that you wash it well before you start to use it. After you wash it you can enjoy your new soft, clean quilt.
This DIY project is economical and at the same time a fun activity. Bed linen can be very expensive and sometimes it’s hard for us to find something we like. For these reasons, the idea of creating your own quilt with scraps that you already own can be really useful.
In conclusion, recycling is very important. If you have old clothes, separate them. Don’t throw away your waste! There’s always some alternative you can do to give your old scraps a second chance. So, create something special, cheer up your bedroom, and sleep pleasantly with your new bedspread.
Creating quilts, blankets and bedspreads with scraps is an activity that comes from a long line of tradition. Learn how to make your own bedspread or quilt with assorted pieces of fabric.
To feel comfortable and be able to rest properly, we must personalize our bedroom with textures and colors that please us. If you want to engage in a fun activity and you also need a new bedspread or quilt, you’re in the right place. In this article we’ll give you some creative ideas about how to make your own bedspread with different pieces of fabric.
If you follow the guidelines correctly, you’ll easily be able to give a second life to fabrics that you no longer use. Recycling is actually a great idea and is important when we think about reducing our environmental footprint.
Picking your fabric
The first thing you should do is gather all the fabric that you want to incorporate into your quilt that’s sitting around your home. Use fabric that you would otherwise throw away. You can use old clothes and sheets or curtains that you no longer use. You can also ask family and friends to help you collect old textiles from their own homes.
Look at and analyze the material well. Remember that this is going to end up on your bed. For this reason it should be as soft as possible. If the texture is rough or uncomfortable, get rid of it. This will only irritate your skin.
Choose the right colors and textures
Once you’ve collected a decent amount of fabric, choose the ones that you like most. Try to combine solid and patterned pieces. Use your favorite colors and imagine how you’re going to place them together so that the result is aesthetically pleasing.

Materials you’ll need
To create your quilt with remnants or scraps in the most comfortable way, you’ll need the following materials:
- Measuring tape
- Scissors
- Thread
- Needle
- Pins
- Paper adhesive tape
- Ballpoint pen or pencil
- Sewing machine (optional)
- Wide table
- Griddle
This is all you’ll need to create the best quilt possible.
Take measurements
Once you’ve chosen your favorite pieces of fabric, you should proceed to measure the size of the quilt or bedspread that you already have on your bed. Pay attention here! You can either make your new quilt the same size or larger than the one you already have. Take final measurements with your tape measure. Write them down so you don’t forget them.
Cut the pieces of fabric
The great thing about DIY projects is that there aren’t any strict rules that you need to follow. You can choose to cut squares, triangles, or rectangles of different sizes. You can simply cut each piece of fabric into the same shape and size. You’ll have to make a decision about how to cut your fabric based on the sizes of fabric that you already have.
Do a test before sewing
Before joining all the pieces together, do a test run. First, put the pieces together and arrange them in the way you want to sew them. Play with the colors and sizes. Don’t forget that you need to take into account the total size of your bedspread or quilt. You should do this trial run so that you don’t make mistakes while sewing. If you have a guide, things will be much easier and you’ll know that you won´t make any errors.
On each side of the quilt, stick a small piece of tape with the corresponding number or letter. This way you’ll know which patch you’re supposed to place next to another and you can keep things organized. On the other hand, if you want to let your imagination go, you can improvise and join the pieces and mix them randomly, depending on what you see fit.
Proceed to join the pieces
Once you’re done with the test, proceed to sew each of the pieces together to create the quilt. Remember that you should always leave 0.5 cm of seam allowance on each piece. If you don’t take this into account, your bedspread or quilt will be smaller than you want it to be.
We recommend you do this with a sewing machine. If you don’t have one and you know how to sew by hand, don’t worry, you can go this route.
Sew all the pieces together depending on their shape. You’ll have to hold each piece and place it correctly. You position it on the opposite or “wrong” side. Therefore, you’ll do the stitching on the lower face of the surface. Try to control the measurements as you add each patch to the quilt. That way you’ll keep things even and it’ll be the size that you want it to be.
Remember, if you want to perform this procedure by sewing manually it’ll take you more time. Ideally, use a thicker thread to reinforce the seams. Otherwise you run the risk of the fabric falling apart.

Iron your quilt
When you’ve finished putting all the pieces together, you’ll have completed your bedspread. Then you must iron the entire surface to set the seams.
Underlay the base fabric
If you wish, once you’ve finished the above procedure, you can line your bedspread with a smooth fabric. An easy option is to use a sheet that you already have for the lining. Sew the lining to the underside of your bedspread. This way you’ll hide the seams and it’ll give a softer feeling.
Wash it
If you’ve been working with your quilt for a long time, we recommend that you wash it well before you start to use it. After you wash it you can enjoy your new soft, clean quilt.
This DIY project is economical and at the same time a fun activity. Bed linen can be very expensive and sometimes it’s hard for us to find something we like. For these reasons, the idea of creating your own quilt with scraps that you already own can be really useful.
In conclusion, recycling is very important. If you have old clothes, separate them. Don’t throw away your waste! There’s always some alternative you can do to give your old scraps a second chance. So, create something special, cheer up your bedroom, and sleep pleasantly with your new bedspread.


