How to Make a Wooden Bottle Rack

There are two advantages to having a wooden bottle rack. First, you’ll have a specific place to store your wine and liquor bottles. Second, you’ll add a touch of elegance to your home. How would you like to make your own?
It’s always nice to make your rack, even though you can purchase many different styles in furniture stores. You can make it out of slats and other wooden pieces. This is such a simple low-cost project that you can adapt to any classic or modern environment.
How to make a wooden bottle rack
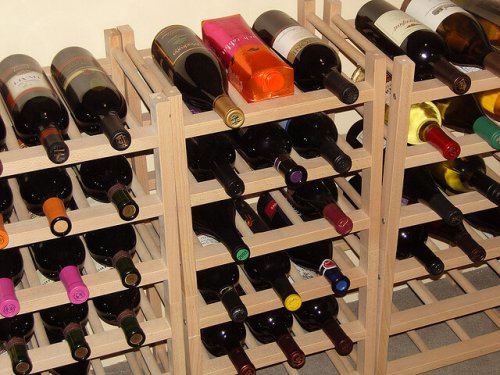
These practical wooden racks are some of the most functional furniture you can make. This type of shelf is great for storing wine or liquor bottles. You can place it in any corner of your kitchen, living room, hall and even on a covered patio.
Of course, you don’t have to be a wine collector or an expert to have this type of furniture at your home. Just build a small rack as it won’t take up too much space. All you need is to be able to store a few bottles for special occasions. Let’s get to it!
Things you’ll need
- A circular saw
- Paint and varnish
- Wooden slats
Seven steps for making a wooden bottle rack
- Firstly, find some wooden slats to make your bottle rack. Or, you could use PVC, plastic or any other material you can sand. Of course, it must be strong enough to hold the weight of the bottles.
- When your wood is ready, assemble the slats to begin assembling the structure.
- Once your structure is ready, place two slats on every shelf you wish to make.
- Use a circular saw to give a semi-circular shape to the support point of the bottles. It must look like a crescent.
- Then, add enough rows to store your bottles. Of course, calculate the space so that the bottles don’t touch each other.
- Once you finish assembling your rack, paint it and apply varnish to make it look more elegant. If you prefer, leave the wood natural for a rustic style.
- Additionally, you can mount some small wheels to your bottle rack to make it easier to move around the house, minibar style.
If you want a hanging bottle rack then you’ll have to find a light base that’s strong, hinged and has a suitable structure.
Wooden bottle rack with crossed slats
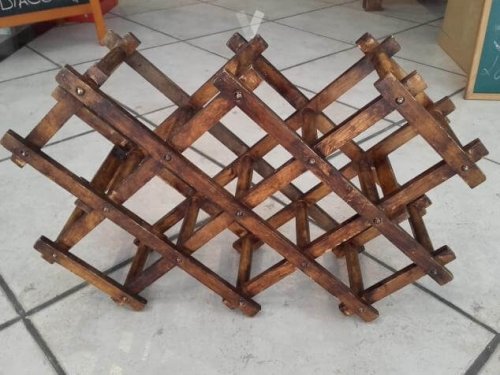
Another great option for making a wooden bottle rack is to make a design with crossed slats. This is a slightly more complex version, but the result is attractive and elegant. Its advantage is that you can make the most of the space you have and it’s perfect for people who don’t store many bottles.
Steps to make a slatted wine rack
- First, make an approximation of how many bottles you’re going to store in your wooden bottle rack. This is so you can calculate how many slats you’re going to need to build it.
- The average diameter of a wine bottle is about 3.5 inches. If you consider this number then you’ll need about 16 feet of slats for this bottle rack version. Also, you must get cylindrical shafts to join both sides.
- Cross the wooden slats diagonally, as shown in the photo above. Fix the slats to a base wooden board to make them firmer.
Tips for locating a bottle rack
As we mentioned above, there are probably many places in your house where you can put your wooden bottle rack. But, if you haven’t decided yet then keep the following in mind:
- Opt for a commonly-used place such as the lounge or an area near your dining room or perhaps your terrace.
- Make sure you have enough space for the bottle rack. You don’t want to make the room seem cluttered. So, find an exclusive spot just for it.
- Finally, if you don’t have enough floor space, make a hanging bottle rack. Be sure to mount it to the wall with some strong fixings to prevent disasters.
Are you ready to do this project? Let’s get to work!
There are two advantages to having a wooden bottle rack. First, you’ll have a specific place to store your wine and liquor bottles. Second, you’ll add a touch of elegance to your home. How would you like to make your own?
It’s always nice to make your rack, even though you can purchase many different styles in furniture stores. You can make it out of slats and other wooden pieces. This is such a simple low-cost project that you can adapt to any classic or modern environment.
How to make a wooden bottle rack
These practical wooden racks are some of the most functional furniture you can make. This type of shelf is great for storing wine or liquor bottles. You can place it in any corner of your kitchen, living room, hall and even on a covered patio.
Of course, you don’t have to be a wine collector or an expert to have this type of furniture at your home. Just build a small rack as it won’t take up too much space. All you need is to be able to store a few bottles for special occasions. Let’s get to it!
Things you’ll need
- A circular saw
- Paint and varnish
- Wooden slats
Seven steps for making a wooden bottle rack
- Firstly, find some wooden slats to make your bottle rack. Or, you could use PVC, plastic or any other material you can sand. Of course, it must be strong enough to hold the weight of the bottles.
- When your wood is ready, assemble the slats to begin assembling the structure.
- Once your structure is ready, place two slats on every shelf you wish to make.
- Use a circular saw to give a semi-circular shape to the support point of the bottles. It must look like a crescent.
- Then, add enough rows to store your bottles. Of course, calculate the space so that the bottles don’t touch each other.
- Once you finish assembling your rack, paint it and apply varnish to make it look more elegant. If you prefer, leave the wood natural for a rustic style.
- Additionally, you can mount some small wheels to your bottle rack to make it easier to move around the house, minibar style.
If you want a hanging bottle rack then you’ll have to find a light base that’s strong, hinged and has a suitable structure.
Wooden bottle rack with crossed slats
Another great option for making a wooden bottle rack is to make a design with crossed slats. This is a slightly more complex version, but the result is attractive and elegant. Its advantage is that you can make the most of the space you have and it’s perfect for people who don’t store many bottles.
Steps to make a slatted wine rack
- First, make an approximation of how many bottles you’re going to store in your wooden bottle rack. This is so you can calculate how many slats you’re going to need to build it.
- The average diameter of a wine bottle is about 3.5 inches. If you consider this number then you’ll need about 16 feet of slats for this bottle rack version. Also, you must get cylindrical shafts to join both sides.
- Cross the wooden slats diagonally, as shown in the photo above. Fix the slats to a base wooden board to make them firmer.
Tips for locating a bottle rack
As we mentioned above, there are probably many places in your house where you can put your wooden bottle rack. But, if you haven’t decided yet then keep the following in mind:
- Opt for a commonly-used place such as the lounge or an area near your dining room or perhaps your terrace.
- Make sure you have enough space for the bottle rack. You don’t want to make the room seem cluttered. So, find an exclusive spot just for it.
- Finally, if you don’t have enough floor space, make a hanging bottle rack. Be sure to mount it to the wall with some strong fixings to prevent disasters.
Are you ready to do this project? Let’s get to work!


