4 Easy Steps to Make Cute Wooden Animals
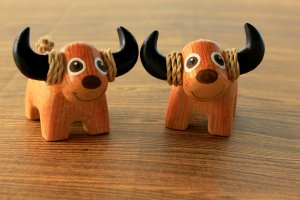
In today’s post, we want to show you how to make cute wooden animals.
Woodworking is a profession but many people also practice it as a relaxing or creative hobby. If you like crafts or DIY projects, wooden animals are definitely something to consider.
Many cities offer classes or workshops of all levels for people interested in woodworking. If you can’t find any options where you live, you can find many videos on YouTube (like this link here). These explain how to make the right cuts to make little animal figurines.
You can make them to decorate your home, or you can use them as toys for your children. They’ll provide big benefits for them, including:
- Stimulating their creativity. As simple toys, your children will have to use brain power to come up with fun and interesting games.
- Sturdy: wooden figurines will last must longer than other objects.
- No choking hazard. Unlike plastic toys, these wooden animals present no dangers. Make sure to sand them well to prevent any splinters.
Check out the stops below to make these cute little animals.
1. Choosing the right wood
You can use hard or soft woods. Especially if you’re a beginner, soft woods are better to work with. In addition, they tend to be cheaper than hard woods.
However, the biggest downside of soft wood is that their natural finish is not very attractive. Consequently, most people choose to paint or varnish them, or both. Some examples of soft woods include pine, maple, ash, birch, poplar, linden, beech, cherry, and walnut.
Try looking for wood at craft or home improvement stores. You’ll also likely find the tools you need in these places as well.
2. Draw or paint on your animal figurines
Once you have your wood, it’s time to make a pattern or a design. You can find prepared patterns in stores as well as on the internet. There are plenty of places where you can find them for free.
Using tracing paper, transfer the pattern onto the wood. The tracing paper will make it easier to completely erase the lines.
Then, you can start carving out your wooden animal. But make sure you’re using a work desk. A proper work zone will make woodworking easier and give you a space to position your figurine as you work.
3. Getting started
Before you get to work, first make sure that your tools are nice and sharp for a smoother process.
To start, grab a gouge and begin removing pieces of wood. Make sure to follow the lines of the pattern that you previously traced. Keep removing pieces of wood until your wooden animal has a rough, basic shape.
Use a small chisel for the smaller details. Regardless of how minimum the detail, always remember to use small instruments to make it. Afterward, sand the entire figurine gently and be sure not to damage the wood.
4. Apply the finish
After sanding the entire animal, paint or apply a coat of varnish (or both). Though you don’t have to do it, we recommend this for a beautiful result.
If you decide to use both paint and varnish, be sure to paint first and apply the varnish as a protective layer. You can use paint to give your wooden animals a realistic or artistic finish.
As you’ve read with us today, making wooden animal figurines isn’t that difficult, even if you’re a beginner. Just make sure to work carefully and pay attention to the details.


