4 Home Repairs You Can Tackle Yourself
Even despite taking excellent care of your home, home repairs are inevitable. Time will ultimately have a physical toll on your home.
The more family members you have, especially if they’re children, the more wear and tear. That’s precisely why occasional home repairs are so important.
In our post today, learn about four simple projects that you can tackle yourself.
Easy home repairs
Approach your projects calmly and don’t give up halfway into the repair – the result will be well worth your efforts.
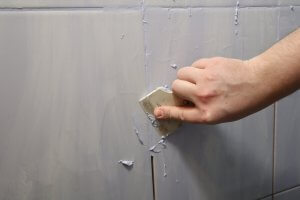
1. Fixing a broken tile
Many people use tiles in their home decor because they’re resilient and withstand time. But they can also suffer from damage or cracks. Follow these steps to fix a broken tile:
- Insert the tip of a knife in the corners. Applying gentle force, try to remove the tile without breaking it further.
- Wipe the entire area with a damp rag. Let dry and scrape off the remaining bits of the old adhesive with a spatula.
- Glue the pieces of the tile together with contact cement or resin epoxy glue.
- Once the tile is dry, apply glue to each of the corners and in the center on the back. Stick the tile back into its original place.
2. Evening out an irregularity in your carpet

Many people see carpets as the perfect solution for creating a cozy setting. But their fibers aren’t exempt from damage and stains. Here are the steps to fixing any carpet problems:
- Saving the leftover carpet pieces from its installation will come in handy when you face a stain or irregularity. When you need to fix an irregularity, cut out a piece from the leftovers and pin it onto the area you want to fix.
- Applying a good amount a pressure, use a straight-edge box cutter to cut. Make sure that the replacement piece and the piece you want to replace at the same time to make sure they’re the same size. Remove the piece you want to replace from your carpet and clean the surface underneath well.
- Apply an adhesive onto the bare surface with a brush. After, stick on the new piece of carpet. Be careful not to use too much adhesive as it can spill out and stain the surrounding areas.
- When you stick on the new piece of carpet, make sure that the fibers follow the same direction as the rest of the fibers. Press on the borders firmly.
Medium-difficulty home repairs
If our first home repairs were a piece of cake for you, check out these medium-difficulty projects. But don’t let them make you nervous– you’ll do a great job.
3. Replacing a broken tile
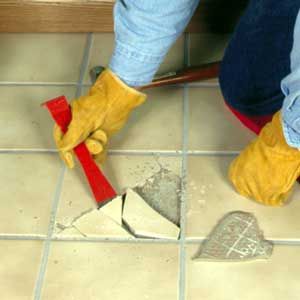
Is there anything more frustrating than noticing a broken tile, or a few, on your floor? It’s time to replace them. Here are the steps for replacing broken tiles:
- Use a hammer and chisel to completely break the tile. Work from the center to the borders to protect the surrounding tiles. After, clean the area.
- Use a palette knife to spread a layer of cement onto the bare area. Take your time to even it out. Use small quantities of cement at a time to prevent it from spilling over later.
- Now, place the new tile in by pressing on the borders. Wipe it with a damp rag. Using a spirit level to ensure that the tile is level is always a good idea.
- Let the cement dry for at least 24 hours. When dry, cover the corners with grout. Leave on for 15 minutes and after, clean off the tile with a damp rag. After a few days of rest, you can freely walk on your new tile.
4. Replacing broken glass
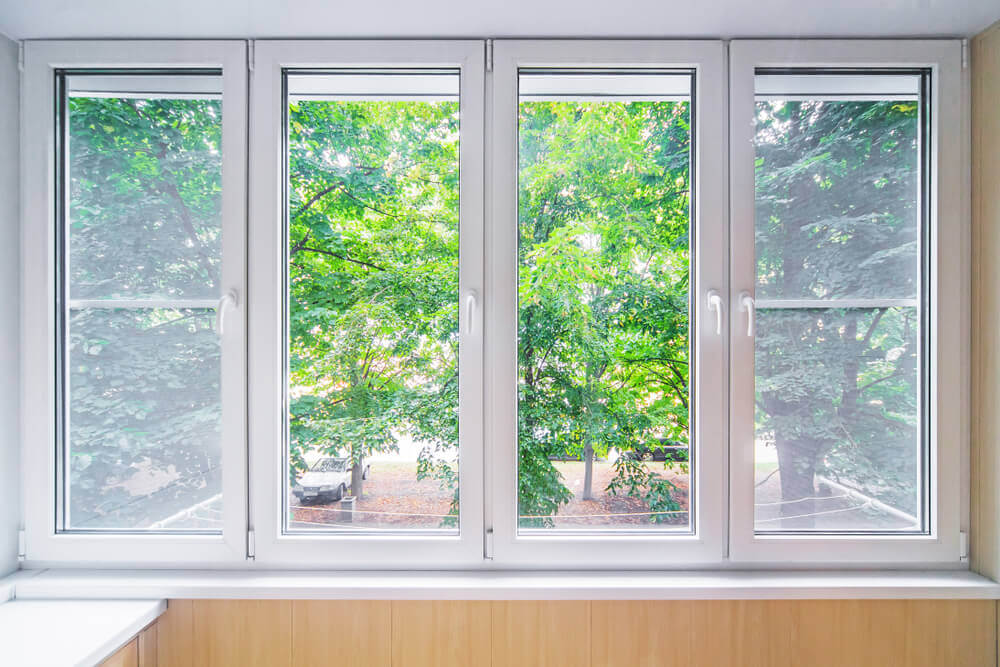
Windows break all too easily. Whether the culprit was the wind or your children playing with a ball… Don’t worry! Everything has a solution! Follow these steps:
- Finish the job. Break the remaining parts of the glass with extreme caution. Use a chisel to remove the putty residue. If you come across nails, remove them with a pair of pliers.
- We recommend applying a coat of linen seed oil to hydrate your wood. The old putty residue will be much easier to remove if your wood is hydrated. Now on the lower part of the frame where the new piece of glass will rest, place a thin line of new putty.
- Set the glass onto the lower part of the frame and press down. Nail in headless nails around the glass with the handle of the chisel to prevent it from breaking.
- Now fit the window into its place and hide the nails with another layer of putty. Use a spatula to scrape off any excess.
As you’ve read with us today, you can do home repairs with no problem. In any case, we hope you don’t have to do too many!
Even despite taking excellent care of your home, home repairs are inevitable. Time will ultimately have a physical toll on your home.
The more family members you have, especially if they’re children, the more wear and tear. That’s precisely why occasional home repairs are so important.
In our post today, learn about four simple projects that you can tackle yourself.
Easy home repairs
Approach your projects calmly and don’t give up halfway into the repair – the result will be well worth your efforts.
1. Fixing a broken tile
Many people use tiles in their home decor because they’re resilient and withstand time. But they can also suffer from damage or cracks. Follow these steps to fix a broken tile:
- Insert the tip of a knife in the corners. Applying gentle force, try to remove the tile without breaking it further.
- Wipe the entire area with a damp rag. Let dry and scrape off the remaining bits of the old adhesive with a spatula.
- Glue the pieces of the tile together with contact cement or resin epoxy glue.
- Once the tile is dry, apply glue to each of the corners and in the center on the back. Stick the tile back into its original place.
2. Evening out an irregularity in your carpet
Many people see carpets as the perfect solution for creating a cozy setting. But their fibers aren’t exempt from damage and stains. Here are the steps to fixing any carpet problems:
- Saving the leftover carpet pieces from its installation will come in handy when you face a stain or irregularity. When you need to fix an irregularity, cut out a piece from the leftovers and pin it onto the area you want to fix.
- Applying a good amount a pressure, use a straight-edge box cutter to cut. Make sure that the replacement piece and the piece you want to replace at the same time to make sure they’re the same size. Remove the piece you want to replace from your carpet and clean the surface underneath well.
- Apply an adhesive onto the bare surface with a brush. After, stick on the new piece of carpet. Be careful not to use too much adhesive as it can spill out and stain the surrounding areas.
- When you stick on the new piece of carpet, make sure that the fibers follow the same direction as the rest of the fibers. Press on the borders firmly.
Medium-difficulty home repairs
If our first home repairs were a piece of cake for you, check out these medium-difficulty projects. But don’t let them make you nervous– you’ll do a great job.
3. Replacing a broken tile
Is there anything more frustrating than noticing a broken tile, or a few, on your floor? It’s time to replace them. Here are the steps for replacing broken tiles:
- Use a hammer and chisel to completely break the tile. Work from the center to the borders to protect the surrounding tiles. After, clean the area.
- Use a palette knife to spread a layer of cement onto the bare area. Take your time to even it out. Use small quantities of cement at a time to prevent it from spilling over later.
- Now, place the new tile in by pressing on the borders. Wipe it with a damp rag. Using a spirit level to ensure that the tile is level is always a good idea.
- Let the cement dry for at least 24 hours. When dry, cover the corners with grout. Leave on for 15 minutes and after, clean off the tile with a damp rag. After a few days of rest, you can freely walk on your new tile.
4. Replacing broken glass
Windows break all too easily. Whether the culprit was the wind or your children playing with a ball… Don’t worry! Everything has a solution! Follow these steps:
- Finish the job. Break the remaining parts of the glass with extreme caution. Use a chisel to remove the putty residue. If you come across nails, remove them with a pair of pliers.
- We recommend applying a coat of linen seed oil to hydrate your wood. The old putty residue will be much easier to remove if your wood is hydrated. Now on the lower part of the frame where the new piece of glass will rest, place a thin line of new putty.
- Set the glass onto the lower part of the frame and press down. Nail in headless nails around the glass with the handle of the chisel to prevent it from breaking.
- Now fit the window into its place and hide the nails with another layer of putty. Use a spatula to scrape off any excess.
As you’ve read with us today, you can do home repairs with no problem. In any case, we hope you don’t have to do too many!


