4 Tips on Putting up Moisture-Resistant Wallpaper
Not that long ago, people would have said you were crazy to put wallpaper in a bathroom. Things are changing, though. There are lots of new resistant materials and products that give you more decorative options. Today, we’re going to focus on moisture-resistant wallpaper, and give you 4 tips on how to choose the right one for you, and put it up properly.
Keep on reading to learn more about this great decorative tool. You’ll find yourself with a cheap, simple way to give your bathroom a whole new look.
Moisture-resistant wallpaper tips
1. Always choose special paper for your bathroom
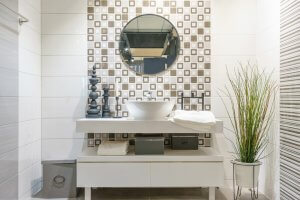
You’ll see all kinds of wallpaper online and in stores. It comes in just about every single color, pattern, and texture imaginable. Some of them are even so realistic that they look like tiles or bricks. You can hardly tell the difference without touching them.
As much as you might love one in particular, make sure it’s one that the manufacturer has made especially for a bathroom. A moisture-resistant wallpaper is much different from the regular kind. It’s tougher in general and can withstand a damp room. If you get the kind not made for bathrooms, it will wrinkle and look old before long.
2. Use glue with fungicides
Once you’ve picked out a wallpaper that will work for your bathroom, you should take a look at what it’s made out of. Our suggestion is that you pick one that has some kind of fungicide.
The bathroom is the dampest room in the house. Even if you ventilate yours perfectly, it’s impossible to avoid damp from building up, especially right after a shower or bath. That’s why it’s important to choose a wallpaper with fungicides in it.

Fungicides are toxic substances that keep fungi from growing in your home. Wallpapers with these components in them tend to be a bit more expensive than other kinds, but are a good investment in the long run. If you use this kind in your bathroom, you won’t have to worry about moisture, fungi, or constant wallpaper upkeep.
3. Cut off any excess paper with the help of a ruler
Once you’ve chosen your wallpaper and made sure it has the right components in it, all you have to do is put it up. Here’s a tutorial on how to put up wallpaper, to give you a more detailed idea of the process.
One of the parts to be most careful with is when you have to cut off the excess paper. We suggest using a ruler to help you make sure you get a straight, clean cut that goes perfect with the top, sides, and bottom. Use your hands or a trowel to make sure there are no bubbles, and that the paper has stuck properly.
It’s not really worth buying high-quality wallpaper if you don’t put it up right. We don’t just mean that on an aesthetic level, though. It could also lead to other problems like not insulating the moisture properly. This is why it’s so important to be careful during each step. It’s the only way to make sure the wallpaper is long-lasting.
4. Let the paper dry
Once you’ve put the moisture-resistant wallpaper up on one wall or all of them, you need to let it dry completely. Wait at least as many hours as the manufacturer suggests, and if possible, let it dry overnight.
Like we said earlier, the bathroom is the dampest room in the entire home. That’s just one more reason that proper drying is so important. If you shower or bathe before it has dried fully, the paper might not adhere and bubbles could form, or it could start to fall off after a short while. Follow the instructions to make sure it’s perfect.
Follow these tips and pick out the wallpaper you like best, and you’ll be able to give a wonderful new look to this part of your home. Just remember to be careful every step of the way, and make sure you put the paper up the right way so it can last you as long as possible!
Not that long ago, people would have said you were crazy to put wallpaper in a bathroom. Things are changing, though. There are lots of new resistant materials and products that give you more decorative options. Today, we’re going to focus on moisture-resistant wallpaper, and give you 4 tips on how to choose the right one for you, and put it up properly.
Keep on reading to learn more about this great decorative tool. You’ll find yourself with a cheap, simple way to give your bathroom a whole new look.
Moisture-resistant wallpaper tips
1. Always choose special paper for your bathroom
You’ll see all kinds of wallpaper online and in stores. It comes in just about every single color, pattern, and texture imaginable. Some of them are even so realistic that they look like tiles or bricks. You can hardly tell the difference without touching them.
As much as you might love one in particular, make sure it’s one that the manufacturer has made especially for a bathroom. A moisture-resistant wallpaper is much different from the regular kind. It’s tougher in general and can withstand a damp room. If you get the kind not made for bathrooms, it will wrinkle and look old before long.
2. Use glue with fungicides
Once you’ve picked out a wallpaper that will work for your bathroom, you should take a look at what it’s made out of. Our suggestion is that you pick one that has some kind of fungicide.
The bathroom is the dampest room in the house. Even if you ventilate yours perfectly, it’s impossible to avoid damp from building up, especially right after a shower or bath. That’s why it’s important to choose a wallpaper with fungicides in it.
Fungicides are toxic substances that keep fungi from growing in your home. Wallpapers with these components in them tend to be a bit more expensive than other kinds, but are a good investment in the long run. If you use this kind in your bathroom, you won’t have to worry about moisture, fungi, or constant wallpaper upkeep.
3. Cut off any excess paper with the help of a ruler
Once you’ve chosen your wallpaper and made sure it has the right components in it, all you have to do is put it up. Here’s a tutorial on how to put up wallpaper, to give you a more detailed idea of the process.
One of the parts to be most careful with is when you have to cut off the excess paper. We suggest using a ruler to help you make sure you get a straight, clean cut that goes perfect with the top, sides, and bottom. Use your hands or a trowel to make sure there are no bubbles, and that the paper has stuck properly.
It’s not really worth buying high-quality wallpaper if you don’t put it up right. We don’t just mean that on an aesthetic level, though. It could also lead to other problems like not insulating the moisture properly. This is why it’s so important to be careful during each step. It’s the only way to make sure the wallpaper is long-lasting.
4. Let the paper dry
Once you’ve put the moisture-resistant wallpaper up on one wall or all of them, you need to let it dry completely. Wait at least as many hours as the manufacturer suggests, and if possible, let it dry overnight.
Like we said earlier, the bathroom is the dampest room in the entire home. That’s just one more reason that proper drying is so important. If you shower or bathe before it has dried fully, the paper might not adhere and bubbles could form, or it could start to fall off after a short while. Follow the instructions to make sure it’s perfect.
Follow these tips and pick out the wallpaper you like best, and you’ll be able to give a wonderful new look to this part of your home. Just remember to be careful every step of the way, and make sure you put the paper up the right way so it can last you as long as possible!


