Make Your Own Shoe Rack With Boxes
A shoe rack with boxes is really practical. Thanks to shoe racks, shoes stay organized and finding them is much easier. Shoe racks can be found at any furniture store, but we’ll explain how to make one yourself. This way you’ll have a very cheap shoe rack, with bespoke measurements the finish that you want.
If this idea convinces you, don’t wait any longer! Read the steps that you must follow to have a shoe rack with boxes. It’ll be recycled and totally personalize your home.
Step 1: Find boxes of different kinds
The first step you must follow to assemble your own shoe rack with boxes is to look for different kinds of wooden boxes. The size and characteristics of the boxes will depend on the number and size of the shoes you want to store.
Our recommendation is to find at least three different types of boxes, such as the following:
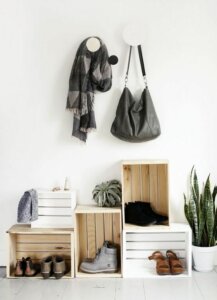
- Normal wooden box. These basic boxes can be placed using one of their narrow sides as a base, are perfect for storing tall boots. Placed using one of the long sides as a base, they can store any sandal or sports shoe.
- Wooden wine bottle box. The characteristic of these boxes is that inside they have a wooden separator that divides the box into eight or twelve sections. That’s why these boxes are perfect for storing shoes that take up little space, such as children’s shoes or flat sandals.
- Small wooden boxes. These types of boxes are optional. We love them because they create a more varied and original structure. They’re just as practical and break the monotony of size of the other two types of boxes.
Step 2: Make a shoe rack with boxes, get ready to sand
Once you’ve chosen the boxes you want, it’s necessary to work them so that they have a smooth finish. With the help of an electric sander or manual sandpaper, sand each of the boards that make up the boxes.
Check that all the nails and staples are correctly placed and that none pose a danger when picking up the shoes. If so, hit it with a hammer or remove it and put in a new one.
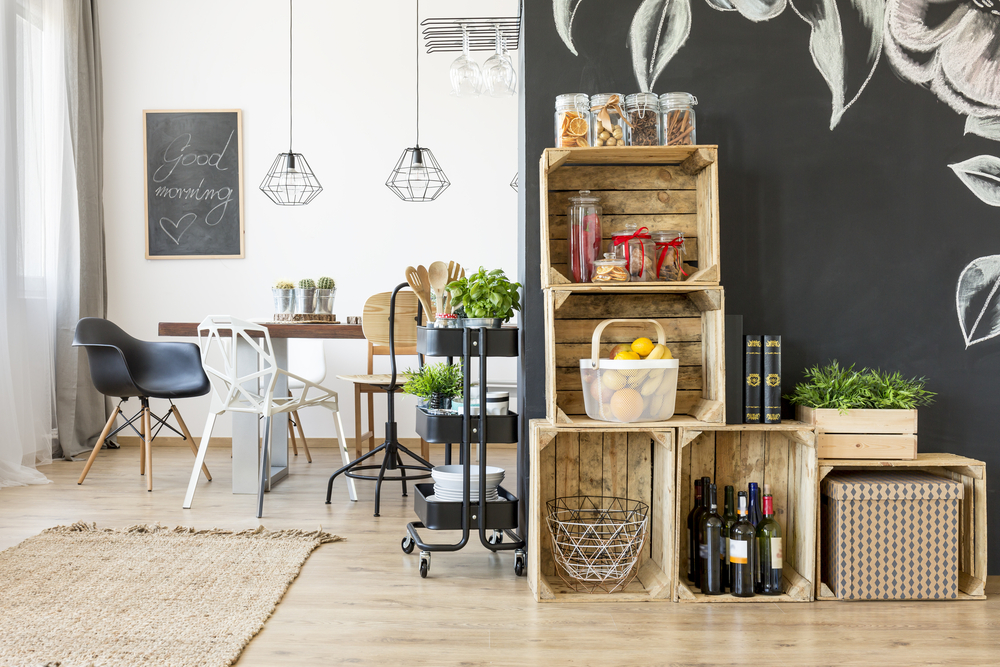
Step 3: Paint the boxes or leave them natural
Now that the wood has a smooth finish, it’s time to apply a treatment to the boxes. In addition to fulfilling an aesthetic function, paint or varnish guarantees the durability of the material and protects it from the passage of time.
Depending on the predominant colors of the room in which you’re going to install your shoe rack with boxes, your tastes and the decoration of your home, you can choose one color or combine several. In any case, our recommendation is to apply a layer of varnish so that the wood is kept in perfect condition.
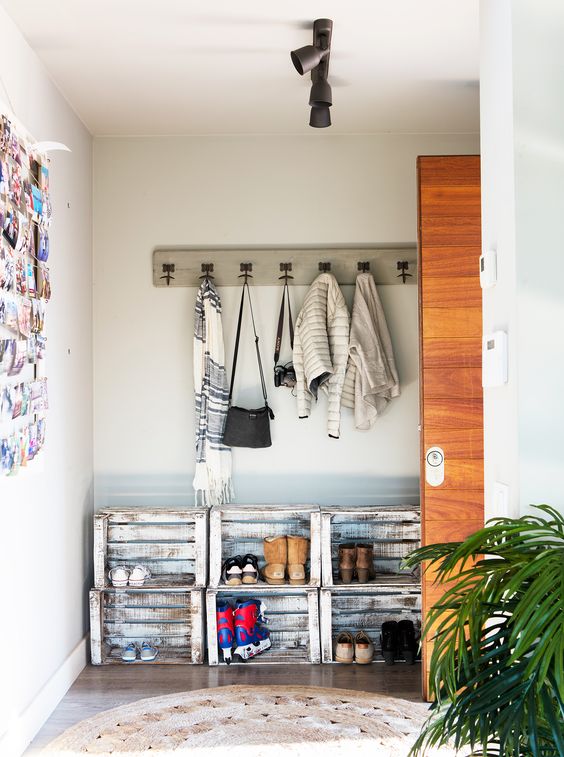
Step 4: Make a shoe rack with boxes and assemble the frame
Once the different boxes are sanded, all that remains is to assemble the structure. To do this you must combine the different types of boxes. The height and length of the shoe rack will depend on the space in which you want to install it and the number of pairs of shoes you want to store.
If it’s a small and not very tall shoe rack, you can place the boxes on top of each other without the need to fix it with any material. On the other hand, if the shoe rack is going to be large or if you have children, it’ll be safer to anchor it to the wall and the boxes to each other.
For this you can use special glue for wood or nails. In the event that you use nails, you must be especially careful because if the boxes are old, the wood can crack and break.
Step 5: Bring your shoe rack to life with boxes!
Now you just have to give life to the shoe rack that you’ve created yourself. The time has finally come to order your shoes! From now on, you’ll have all your footwear in view. In addition, thanks to the different dividers, all types of footwear have a space and you’ll find each pair easily.
Once again, DIY proposals always work! It’s easy to make and in such an economical way too.
A shoe rack with boxes is really practical. Thanks to shoe racks, shoes stay organized and finding them is much easier. Shoe racks can be found at any furniture store, but we’ll explain how to make one yourself. This way you’ll have a very cheap shoe rack, with bespoke measurements the finish that you want.
If this idea convinces you, don’t wait any longer! Read the steps that you must follow to have a shoe rack with boxes. It’ll be recycled and totally personalize your home.
Step 1: Find boxes of different kinds
The first step you must follow to assemble your own shoe rack with boxes is to look for different kinds of wooden boxes. The size and characteristics of the boxes will depend on the number and size of the shoes you want to store.
Our recommendation is to find at least three different types of boxes, such as the following:
- Normal wooden box. These basic boxes can be placed using one of their narrow sides as a base, are perfect for storing tall boots. Placed using one of the long sides as a base, they can store any sandal or sports shoe.
- Wooden wine bottle box. The characteristic of these boxes is that inside they have a wooden separator that divides the box into eight or twelve sections. That’s why these boxes are perfect for storing shoes that take up little space, such as children’s shoes or flat sandals.
- Small wooden boxes. These types of boxes are optional. We love them because they create a more varied and original structure. They’re just as practical and break the monotony of size of the other two types of boxes.
Step 2: Make a shoe rack with boxes, get ready to sand
Once you’ve chosen the boxes you want, it’s necessary to work them so that they have a smooth finish. With the help of an electric sander or manual sandpaper, sand each of the boards that make up the boxes.
Check that all the nails and staples are correctly placed and that none pose a danger when picking up the shoes. If so, hit it with a hammer or remove it and put in a new one.
Step 3: Paint the boxes or leave them natural
Now that the wood has a smooth finish, it’s time to apply a treatment to the boxes. In addition to fulfilling an aesthetic function, paint or varnish guarantees the durability of the material and protects it from the passage of time.
Depending on the predominant colors of the room in which you’re going to install your shoe rack with boxes, your tastes and the decoration of your home, you can choose one color or combine several. In any case, our recommendation is to apply a layer of varnish so that the wood is kept in perfect condition.
Step 4: Make a shoe rack with boxes and assemble the frame
Once the different boxes are sanded, all that remains is to assemble the structure. To do this you must combine the different types of boxes. The height and length of the shoe rack will depend on the space in which you want to install it and the number of pairs of shoes you want to store.
If it’s a small and not very tall shoe rack, you can place the boxes on top of each other without the need to fix it with any material. On the other hand, if the shoe rack is going to be large or if you have children, it’ll be safer to anchor it to the wall and the boxes to each other.
For this you can use special glue for wood or nails. In the event that you use nails, you must be especially careful because if the boxes are old, the wood can crack and break.
Step 5: Bring your shoe rack to life with boxes!
Now you just have to give life to the shoe rack that you’ve created yourself. The time has finally come to order your shoes! From now on, you’ll have all your footwear in view. In addition, thanks to the different dividers, all types of footwear have a space and you’ll find each pair easily.
Once again, DIY proposals always work! It’s easy to make and in such an economical way too.


