How to Hammer a Nail Without Damaging your Wall
Despite what many people might think, it is possible to hammer a nail into your wall without damaging it or leaving it covered in unsightly marks.
Some people avoid putting up shelves, paintings and other decorative objects altogether, for fear of damaging their walls. However, this doesn’t have to be the case. There are techniques that will allow you to hammer nails into your wall without making a mess.
In this next section, we’ll show you the right way to hammer in a nail. Follow our advice, you’ll be able to decorate your walls to your heart’s content.
It’s normal to make mistakes
If you don’t have any experience using nails, it’s normal to make mistakes. The nails never stay straight, and you end up using more than you originally thought. It’s also normal for paint or the top layer of cement to peel off. You may even find that cracks appear here and there.
If you don’t choose the right place, you may find that some of the paint or cement around the nail may crack and fall off, leaving large holes in your wall. This makes it all the more important to learn how to hammer a nail properly. Though it may seem like mission impossible, all you need is the right technique.
How to hammer a nail without damaging the wall
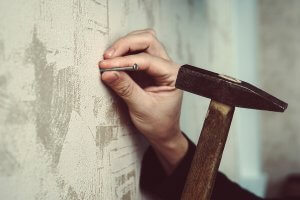
Firstly, it’s important to pinpoint the exact spot you want to hammer your nail, marking the point with a pencil. After that, all you’ll need are a few handy tips.
- Take a sheet of acetate or cardboard and carefully push the nail through it. You don’t need to push it all the way through – the idea is simply to use the cardboard to hold the nail steady. The nail should now stay firmly in place, and you’ll be able to avoid hitting your own fingers.
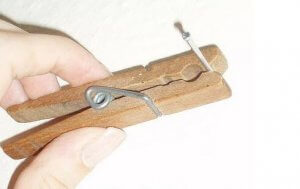
- Instead of cardboard, you could also use a comb, clothes peg or a hairpin, especially if you’re using small nails. If you’re using larger nails, you could use pliers to hold them in place instead.
- Place the cardboard and nail directly over the point you’ve marked on the wall.
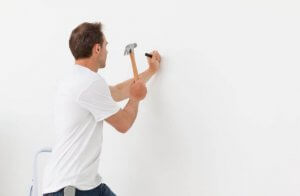
- Hold the hammer near the center of the handle (never by the head) and tap the nail lightly.
- Once the tip of the nail is far enough into the wall that it can stand on its own, remove the sheet of cardboard. Then, continue to hammer until the nail is firmly in place.
Drills and anchors
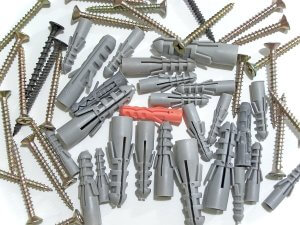
In some cases, you may need to use a drill to make a pilot hole first. This will make it easier to insert the nail into the wall. Once you’ve made the pilot hole, use your fingers to push an anchor into the hole until the head is flush with the wall. Then, insert the screw or nail into the anchor. Anchors are a great way to ensure nails or screws stay in place, and are especially useful when putting up shelves or other heavy objects.
Remember, you can always add a few extra nails for reinforcement if you want to make sure whatever you’re hanging up won’t fall down.
It’s important to buy good quality nails that don’t bend out of shape easily. Similarly, it’s best to analyze the wall material before you get started, as it can determine which tools will be most suitable.
How to hammer a nail – some final advice
If your walls are very thick, take a wine cork and push the nail into it, leaving the tip visible.
Once you’ve hammered the nail into the wall, carefully remove the cork with a knife. Don’t try to pull the cork, as it will simply drag the nail out the wall along with it.
Another way to avoid damaging thick walls is to coat the nail with a small amount of soap or olive oil. This will help make it easier to hammer it into the wall.
And what happens if your walls have wood paneling? In this case, you have to be particularly careful so as not to split the wood. We always recommend making a pilot hole first and lubricating the nails thoroughly. Plus, blunting the tip of the nail can make the wood less likely to split. Experts also advise hammering the nail at a slight angle to help it grip the wood better, providing greater strength and durability.
Hammering a nail doesn’t require brute strength, just a little extra thought. Use the tips and tricks mentioned in this article and you’ll easily be able to decorate your walls with paintings, shelves, and other objects without damaging them.
Despite what many people might think, it is possible to hammer a nail into your wall without damaging it or leaving it covered in unsightly marks.
Some people avoid putting up shelves, paintings and other decorative objects altogether, for fear of damaging their walls. However, this doesn’t have to be the case. There are techniques that will allow you to hammer nails into your wall without making a mess.
In this next section, we’ll show you the right way to hammer in a nail. Follow our advice, you’ll be able to decorate your walls to your heart’s content.
It’s normal to make mistakes
If you don’t have any experience using nails, it’s normal to make mistakes. The nails never stay straight, and you end up using more than you originally thought. It’s also normal for paint or the top layer of cement to peel off. You may even find that cracks appear here and there.
If you don’t choose the right place, you may find that some of the paint or cement around the nail may crack and fall off, leaving large holes in your wall. This makes it all the more important to learn how to hammer a nail properly. Though it may seem like mission impossible, all you need is the right technique.
How to hammer a nail without damaging the wall
Firstly, it’s important to pinpoint the exact spot you want to hammer your nail, marking the point with a pencil. After that, all you’ll need are a few handy tips.
- Take a sheet of acetate or cardboard and carefully push the nail through it. You don’t need to push it all the way through – the idea is simply to use the cardboard to hold the nail steady. The nail should now stay firmly in place, and you’ll be able to avoid hitting your own fingers.
- Instead of cardboard, you could also use a comb, clothes peg or a hairpin, especially if you’re using small nails. If you’re using larger nails, you could use pliers to hold them in place instead.
- Place the cardboard and nail directly over the point you’ve marked on the wall.
- Hold the hammer near the center of the handle (never by the head) and tap the nail lightly.
- Once the tip of the nail is far enough into the wall that it can stand on its own, remove the sheet of cardboard. Then, continue to hammer until the nail is firmly in place.
Drills and anchors
In some cases, you may need to use a drill to make a pilot hole first. This will make it easier to insert the nail into the wall. Once you’ve made the pilot hole, use your fingers to push an anchor into the hole until the head is flush with the wall. Then, insert the screw or nail into the anchor. Anchors are a great way to ensure nails or screws stay in place, and are especially useful when putting up shelves or other heavy objects.
Remember, you can always add a few extra nails for reinforcement if you want to make sure whatever you’re hanging up won’t fall down.
It’s important to buy good quality nails that don’t bend out of shape easily. Similarly, it’s best to analyze the wall material before you get started, as it can determine which tools will be most suitable.
How to hammer a nail – some final advice
If your walls are very thick, take a wine cork and push the nail into it, leaving the tip visible.
Once you’ve hammered the nail into the wall, carefully remove the cork with a knife. Don’t try to pull the cork, as it will simply drag the nail out the wall along with it.
Another way to avoid damaging thick walls is to coat the nail with a small amount of soap or olive oil. This will help make it easier to hammer it into the wall.
And what happens if your walls have wood paneling? In this case, you have to be particularly careful so as not to split the wood. We always recommend making a pilot hole first and lubricating the nails thoroughly. Plus, blunting the tip of the nail can make the wood less likely to split. Experts also advise hammering the nail at a slight angle to help it grip the wood better, providing greater strength and durability.
Hammering a nail doesn’t require brute strength, just a little extra thought. Use the tips and tricks mentioned in this article and you’ll easily be able to decorate your walls with paintings, shelves, and other objects without damaging them.


