Make Your Own Home Bar for Your Living Room
These days, the tradition of having a living room bar has disappeared. The reason behind that might very well be that many modern homes are smaller these days. But you don’t need to have a big home or apartment to enjoy a special area to keep your drinks.
A bar counter doesn’t have to be showy nor does it have to cost a fortune. You only need to invest some time as well as use your creativity to make your own home bar with economic materials, such as pallets or fruit crates. Want to give it a shot?
The advantages of making your own bar
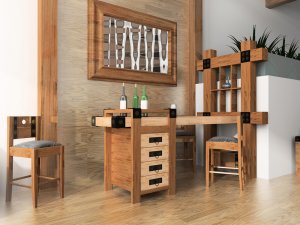
A bar counter can serve two purposes. First, it adds extra decor to living rooms and helps enhance the style. It also keeps glasses and spirits on hand whether you want to celebrate a special occasion or entertain friends.
The best part about making your own bar is that it doesn’t need a huge budget. While furniture stores offer all kinds of home bars in different sizes, designs, and materials, you can also follow a few simple steps and make your own.
In short, the advantages of making your own bar counter are:
- Additional living room decor.
- Perfect for showcasing a collection of drinks, glasses, and bottles.
- A perfect place for gatherings.
- A space to relax without leaving home.
- Easily adjustable to fit small spaces.
How to make your own home bar
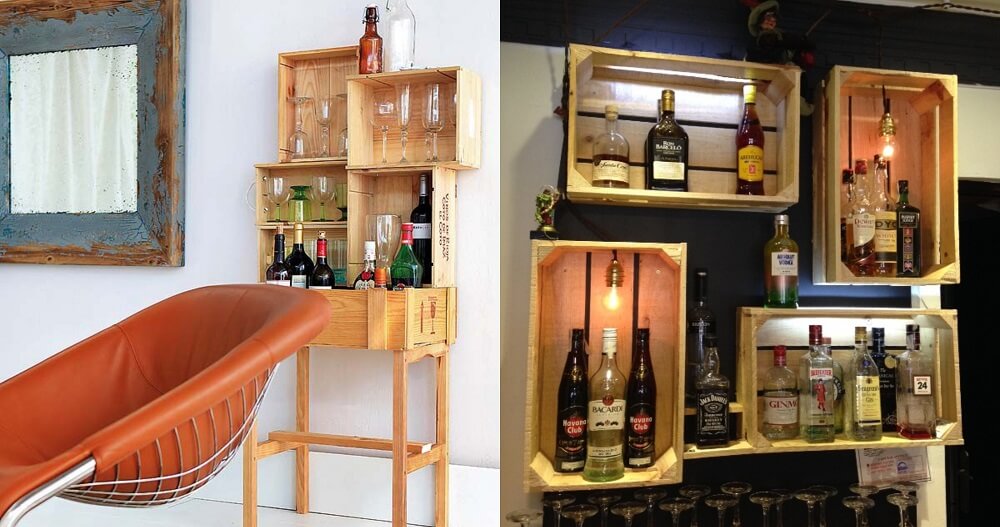
As we mentioned earlier, you won’t need expensive materials to make your own living room bar. To save even more, find wooden crates or pallets at fruit markets or wine stores.
You’ll need
- Wooden boxes in different sizes
- A sander and varnish
- 4 brackets
- A pair of easel or stand legs
- Platens
- Drill
- Compass saw
- Measuring tape
- Screws
Steps
- First, pick out the wooden boxes you want to use for your bar counter. Try looking for bigger boxes that can work as a table.
- Once you have your boxes, attach the legs to the bottom on each side. Attach the legs with a drill and screw a bracket onto each side of the legs, making sure they’re evenly placed.
- Measure the distance between the legs and measure out the same distance onto the wooden board. After, cut out with the compass saw.
- To make sure your counter is strong enough to hold all of your drinks, screw on another wooden board in the center of the counter, between the legs.
- Now, connect the wooden boxes to put up your counter. Mount it by placing your boxes on top of the tabletop as you wish and marking the areas that you want to drill.
- Once you drill the holes, secure the boxes in place with the screws, fixing them in upwards.
- After you’ve attached your boxes to your table, screw the structure onto the main table with the platens. They’ll make your counter much more stable and suitable for its purpose.
- Decorate your bar counter as you please. You can sand and varnish the wood or leave it as it is for a more rustic decor.
Wooden liquor shelf
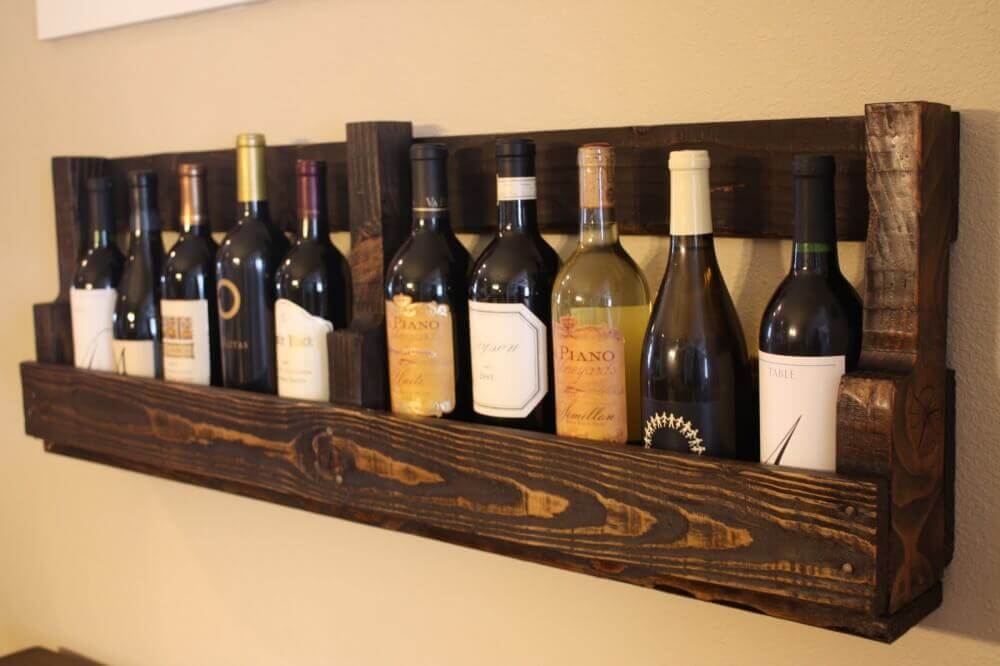
If you’re looking for something simpler and quicker, we have another idea for you – make a small wall shelf to hold your favorite drinks instead. You can make it from scratch with wooden boards or from pallets.
Steps
- Collect wooden pallets and sand them carefully.
- When they’re smooth, add some color by applying wood paint.
- Then, give them a coat of varnish for even better results.
- Once dry, add hooks (or something similar) to fix onto a wall.
As you can see in the image above, a dark wood looks very elegant. But feel free to use a color that matches perfectly with the rest of your living room decor.
These days, the tradition of having a living room bar has disappeared. The reason behind that might very well be that many modern homes are smaller these days. But you don’t need to have a big home or apartment to enjoy a special area to keep your drinks.
A bar counter doesn’t have to be showy nor does it have to cost a fortune. You only need to invest some time as well as use your creativity to make your own home bar with economic materials, such as pallets or fruit crates. Want to give it a shot?
The advantages of making your own bar
A bar counter can serve two purposes. First, it adds extra decor to living rooms and helps enhance the style. It also keeps glasses and spirits on hand whether you want to celebrate a special occasion or entertain friends.
The best part about making your own bar is that it doesn’t need a huge budget. While furniture stores offer all kinds of home bars in different sizes, designs, and materials, you can also follow a few simple steps and make your own.
In short, the advantages of making your own bar counter are:
- Additional living room decor.
- Perfect for showcasing a collection of drinks, glasses, and bottles.
- A perfect place for gatherings.
- A space to relax without leaving home.
- Easily adjustable to fit small spaces.
How to make your own home bar
As we mentioned earlier, you won’t need expensive materials to make your own living room bar. To save even more, find wooden crates or pallets at fruit markets or wine stores.
You’ll need
- Wooden boxes in different sizes
- A sander and varnish
- 4 brackets
- A pair of easel or stand legs
- Platens
- Drill
- Compass saw
- Measuring tape
- Screws
Steps
- First, pick out the wooden boxes you want to use for your bar counter. Try looking for bigger boxes that can work as a table.
- Once you have your boxes, attach the legs to the bottom on each side. Attach the legs with a drill and screw a bracket onto each side of the legs, making sure they’re evenly placed.
- Measure the distance between the legs and measure out the same distance onto the wooden board. After, cut out with the compass saw.
- To make sure your counter is strong enough to hold all of your drinks, screw on another wooden board in the center of the counter, between the legs.
- Now, connect the wooden boxes to put up your counter. Mount it by placing your boxes on top of the tabletop as you wish and marking the areas that you want to drill.
- Once you drill the holes, secure the boxes in place with the screws, fixing them in upwards.
- After you’ve attached your boxes to your table, screw the structure onto the main table with the platens. They’ll make your counter much more stable and suitable for its purpose.
- Decorate your bar counter as you please. You can sand and varnish the wood or leave it as it is for a more rustic decor.
Wooden liquor shelf
If you’re looking for something simpler and quicker, we have another idea for you – make a small wall shelf to hold your favorite drinks instead. You can make it from scratch with wooden boards or from pallets.
Steps
- Collect wooden pallets and sand them carefully.
- When they’re smooth, add some color by applying wood paint.
- Then, give them a coat of varnish for even better results.
- Once dry, add hooks (or something similar) to fix onto a wall.
As you can see in the image above, a dark wood looks very elegant. But feel free to use a color that matches perfectly with the rest of your living room decor.


