Discover the Easiest Way to make Pictures with Carved Wood
Pictures and paintings are one of the most commonly used pieces in interior decoration. Many of them have high value because of the artist, others because of the technique used. Making pictures with carved wood is one of the most difficult tasks out there.
To make any piece of art, especially those made with carved wood, you need a lot of skill and to be good with tools. That’s why these pieces are so sought after.
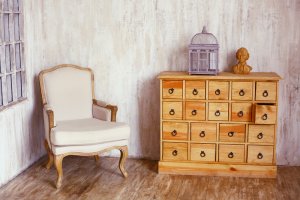
Carved wood works of art are traditional and go perfectly in any country or rustic home. However, it’s often hard to get these pieces because of economic factors and because very few artists are still engaged in this type of work.
In this article, we’ll show you two easy and simple ways to make pictures with carved wood.
Carved wood using a mini-drill
The first method you can use to make a carved wood picture is with a mini-drill. A mini-drill is a small, portable power tool, so it can be operated with just one hand.
It’s important to choose the right tip for your mini-drill when making a carved wood piece. The best option is a wood milling tip. You want to make sure you have great precision when using this tool. We recommend practicing on another piece of wood first before starting your piece of art.
To make carved wood pieces with this tool, you’ll need:
- Wooden board
- Design to carve
- Mini drill
- Wood milling tip
- Frame for the picture
Steps to follow
First, choose a wooden board that’ll be good for carving. Once you’ve done that, transfer the design onto the board; this will make it a lot easier to carve with precision. You can use carbon paper to transfer the design onto the wood.
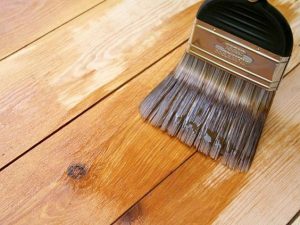
Then, it’s time to start carving the design with the mini drill. Keep your hand steady and imagine the drill is a pencil. Once you’ve finished carving your design, you can paint it or varnish it to give the wood more depth. You can add a frame and then hang it anywhere you want.
Obviously, the mini-drill will never actually replace the craft, but it’s a quick and easy way to make your own carved wood piece.

Fake carving
This technique for making carved wood pieces is known as ‘fake carving’ because the design is done in two parts and then glued together. This gives the piece the appearance of being carved wood when it’s actually not.
To make pieces with this technique, you’ll need:
- Two wooden boards for carving
- Gouges
- Wood glue
- Design that you want to ‘carve’
Steps to follow
First, decide which design you want to make and which part or parts of the design will be in the foreground, and which will be in the background.
The piece that we want in the background will be carved entirely, with the details included. Then, the piece that we want to use for the foreground will be carved separately, on another wooden board. You’ll carve this piece using gouges or even a mini-drill.
Once you’ve finished the two parts, join them together with wood glue. Be very careful with this step since you’ll need to be very precise and clean to get the result you want. If you glue it poorly, it’ll be very noticeable that the pieces were separated and then joined together.
To finish your fake carved wood picture, you can paint it one color or different shades to give it more depth.
It’s never been easier to make carved wood pieces, just use one of these two techniques. However, you should keep in mind that ‘practice makes perfect.’ So, even if you don’t do well the first time, keep practicing.
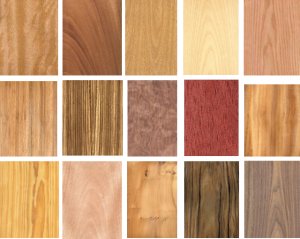
Wood pieces are used a lot in interior decoration because wood provides a lot of warmth. Also, it’s a very versatile material that has a lot of different tonalities.
A lot of people think that working with wood is very difficult. It’s definitely a hard task that requires a lot of skill. However, these two techniques will help you easily dive into the world of wood.
Pictures and paintings are one of the most commonly used pieces in interior decoration. Many of them have high value because of the artist, others because of the technique used. Making pictures with carved wood is one of the most difficult tasks out there.
To make any piece of art, especially those made with carved wood, you need a lot of skill and to be good with tools. That’s why these pieces are so sought after.
Carved wood works of art are traditional and go perfectly in any country or rustic home. However, it’s often hard to get these pieces because of economic factors and because very few artists are still engaged in this type of work.
In this article, we’ll show you two easy and simple ways to make pictures with carved wood.
Carved wood using a mini-drill
The first method you can use to make a carved wood picture is with a mini-drill. A mini-drill is a small, portable power tool, so it can be operated with just one hand.
It’s important to choose the right tip for your mini-drill when making a carved wood piece. The best option is a wood milling tip. You want to make sure you have great precision when using this tool. We recommend practicing on another piece of wood first before starting your piece of art.
To make carved wood pieces with this tool, you’ll need:
- Wooden board
- Design to carve
- Mini drill
- Wood milling tip
- Frame for the picture
Steps to follow
First, choose a wooden board that’ll be good for carving. Once you’ve done that, transfer the design onto the board; this will make it a lot easier to carve with precision. You can use carbon paper to transfer the design onto the wood.
Then, it’s time to start carving the design with the mini drill. Keep your hand steady and imagine the drill is a pencil. Once you’ve finished carving your design, you can paint it or varnish it to give the wood more depth. You can add a frame and then hang it anywhere you want.
Obviously, the mini-drill will never actually replace the craft, but it’s a quick and easy way to make your own carved wood piece.
Fake carving
This technique for making carved wood pieces is known as ‘fake carving’ because the design is done in two parts and then glued together. This gives the piece the appearance of being carved wood when it’s actually not.
To make pieces with this technique, you’ll need:
- Two wooden boards for carving
- Gouges
- Wood glue
- Design that you want to ‘carve’
Steps to follow
First, decide which design you want to make and which part or parts of the design will be in the foreground, and which will be in the background.
The piece that we want in the background will be carved entirely, with the details included. Then, the piece that we want to use for the foreground will be carved separately, on another wooden board. You’ll carve this piece using gouges or even a mini-drill.
Once you’ve finished the two parts, join them together with wood glue. Be very careful with this step since you’ll need to be very precise and clean to get the result you want. If you glue it poorly, it’ll be very noticeable that the pieces were separated and then joined together.
To finish your fake carved wood picture, you can paint it one color or different shades to give it more depth.
It’s never been easier to make carved wood pieces, just use one of these two techniques. However, you should keep in mind that ‘practice makes perfect.’ So, even if you don’t do well the first time, keep practicing.
Wood pieces are used a lot in interior decoration because wood provides a lot of warmth. Also, it’s a very versatile material that has a lot of different tonalities.
A lot of people think that working with wood is very difficult. It’s definitely a hard task that requires a lot of skill. However, these two techniques will help you easily dive into the world of wood.


