Decorate with DIY Butterflies
DIY acrylic butterflies are a great way to decorate your home – whether your kitchen, living room, a bedroom, entrance way or even your backyard. The best part is that the materials are easy to find and this craft is fun. Why not give it a try?
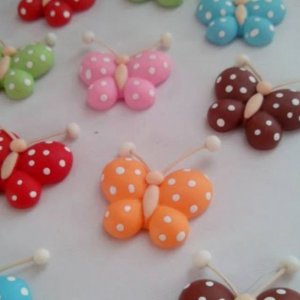
How to make acrylic butterflies
Regardless of how old you are, making acrylic figurines is great fun. If this is your first time using this material, we recommend practicing first. When you have the hang of it you can try more complicated projects. To make acrylic butterflies, you’ll need the following materials:
- Acrylic sheets
- Oven-safe dish
- Heat resistant gloves
- Knife or cutting tool
- Small wooden blocks
- Mold (butterfly-shaped)
- Soap
- Paper towels
- Paint apt for acrylic sheets
- Paintbrush
Here’s how to get started:
- Wash the acrylic sheets (you can find them at arts and craft stores) with soap and warm water to remove any residue. Dry with paper towels.
- Heat the oven to 130º C.
- Place the wooden blocks onto the baking dish to keep the acrylic from sticking to the dish.
- Place the acrylic sheet on top of the blocks. If necessary, cut it with the knife so that it fits in the dish.
- Bake for 15 minutes or until it’s soft enough to handle.
- Wearing the gloves (or oven mitts), remove the dish from the oven and use the butterfly mold to shape the acrylic sheet. Cut off the edges and let it cool and harden.
- Paint your acrylic butterflies different colors. You can even add sequins or other decorative accessories.
Making butterflies with other materials
If you’re not up for making acrylic butterflies or don’t have all the materials and equipment necessary, don’t worry. You still have another great option. You can make them with old CDs or DVDs. It’s a great way to recycle and have some fun as you unleash your artistic side.
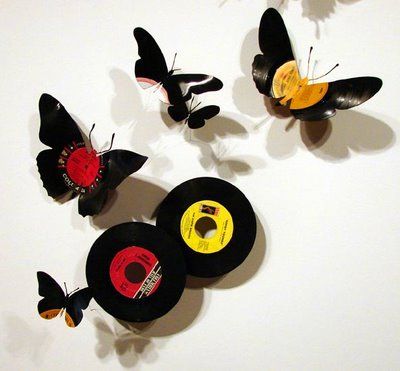
CD butterflies
Once you have your butterflies you can attach a magnet to them and stick them to your refrigerator. Or, glue them onto a stick to decorate your backyard and pots. You could even attach them to a clip and decorate your kitchen curtains. To make these butterflies, you’ll need:
- CDs or DVDs that you don’t use anymore
- Scissors, knife or cutting tool
- Acrylic paint
- Paintbrushes
- Transparent varnish
- A butterfly image that fits on a disc (you can print it out on paper)
Here are the craft instructions:
- Carefully separate the CD in half. You’ll only need the transparent part.
- Cut out the butterfly outline and paste it onto the CD.
- Using scissors, cut out the shape.
- Decorate the butterfly, painting it and adding beads or crystals. Let it dry completely.
- Add a layer of two of the transparent varnish and let dry too. If you want to skip these last two steps, you can always opt for colorful markers or at the very least, a black one for the outlines and ends.
- To prevent the body from breaking (it’s the most fragile part that you’ll also use to attach to a wall or magnets), you can glue a piece of cardboard on the other side. And now your butterfly is ready to embellish your home!
Plastic bottle butterflies
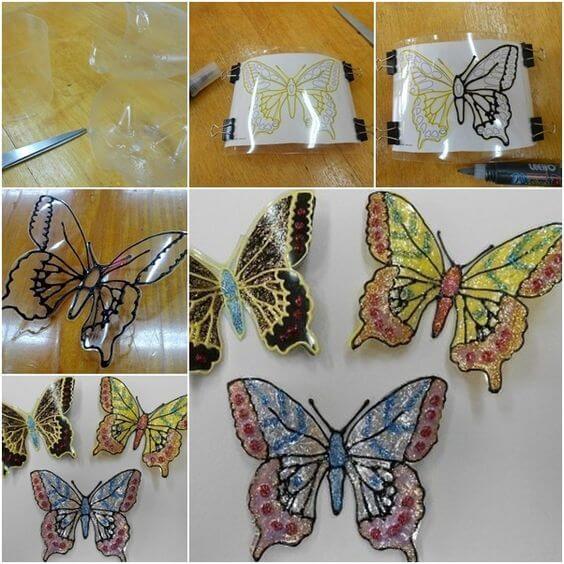
Another craft that’s similar to the CD butterflies calls for transparent plastic bottles. Cut the bottle in half and flatten it out a little and center an image of a butterfly on it. Next, cut out the outline with scissors (it’ll be easier than cutting the CD because the plastic is softer) and paint it in your favorite colors.
For both of these crafts, you can use thin wire for the antennae and add a little color at the ends. And of course, you can glue on any detail that you want to make them sparkle.
They’ll look so cute and perfect in the garden, or anywhere else in your home. Before you go – look for simple butterfly designs with detail. You’ll find thousands of options on the internet!
DIY acrylic butterflies are a great way to decorate your home – whether your kitchen, living room, a bedroom, entrance way or even your backyard. The best part is that the materials are easy to find and this craft is fun. Why not give it a try?
How to make acrylic butterflies
Regardless of how old you are, making acrylic figurines is great fun. If this is your first time using this material, we recommend practicing first. When you have the hang of it you can try more complicated projects. To make acrylic butterflies, you’ll need the following materials:
- Acrylic sheets
- Oven-safe dish
- Heat resistant gloves
- Knife or cutting tool
- Small wooden blocks
- Mold (butterfly-shaped)
- Soap
- Paper towels
- Paint apt for acrylic sheets
- Paintbrush
Here’s how to get started:
- Wash the acrylic sheets (you can find them at arts and craft stores) with soap and warm water to remove any residue. Dry with paper towels.
- Heat the oven to 130º C.
- Place the wooden blocks onto the baking dish to keep the acrylic from sticking to the dish.
- Place the acrylic sheet on top of the blocks. If necessary, cut it with the knife so that it fits in the dish.
- Bake for 15 minutes or until it’s soft enough to handle.
- Wearing the gloves (or oven mitts), remove the dish from the oven and use the butterfly mold to shape the acrylic sheet. Cut off the edges and let it cool and harden.
- Paint your acrylic butterflies different colors. You can even add sequins or other decorative accessories.
Making butterflies with other materials
If you’re not up for making acrylic butterflies or don’t have all the materials and equipment necessary, don’t worry. You still have another great option. You can make them with old CDs or DVDs. It’s a great way to recycle and have some fun as you unleash your artistic side.
CD butterflies
Once you have your butterflies you can attach a magnet to them and stick them to your refrigerator. Or, glue them onto a stick to decorate your backyard and pots. You could even attach them to a clip and decorate your kitchen curtains. To make these butterflies, you’ll need:
- CDs or DVDs that you don’t use anymore
- Scissors, knife or cutting tool
- Acrylic paint
- Paintbrushes
- Transparent varnish
- A butterfly image that fits on a disc (you can print it out on paper)
Here are the craft instructions:
- Carefully separate the CD in half. You’ll only need the transparent part.
- Cut out the butterfly outline and paste it onto the CD.
- Using scissors, cut out the shape.
- Decorate the butterfly, painting it and adding beads or crystals. Let it dry completely.
- Add a layer of two of the transparent varnish and let dry too. If you want to skip these last two steps, you can always opt for colorful markers or at the very least, a black one for the outlines and ends.
- To prevent the body from breaking (it’s the most fragile part that you’ll also use to attach to a wall or magnets), you can glue a piece of cardboard on the other side. And now your butterfly is ready to embellish your home!
Plastic bottle butterflies
Another craft that’s similar to the CD butterflies calls for transparent plastic bottles. Cut the bottle in half and flatten it out a little and center an image of a butterfly on it. Next, cut out the outline with scissors (it’ll be easier than cutting the CD because the plastic is softer) and paint it in your favorite colors.
For both of these crafts, you can use thin wire for the antennae and add a little color at the ends. And of course, you can glue on any detail that you want to make them sparkle.
They’ll look so cute and perfect in the garden, or anywhere else in your home. Before you go – look for simple butterfly designs with detail. You’ll find thousands of options on the internet!


